
Power BI is a collection of software services, apps, and connectors that work together to turn your unrelated sources of data into coherent, visually immersive, and interactive insights. Your data can be an Excel spreadsheet, or a collection of data warehouses both cloud-based and on-premises. With Power BI, you can easily connect to your data sources, visualize and discover what's important, and share that with anyone.
This topic demonstrates how to connect to OceanBase Cloud and display data in Power BI using the MySQL compatible mode of the OceanBase Cloud database as an example.
Prerequisites
You have registered for Power BI. For more information, refer to Power BI.
Notice
Using Power BI is subject to Alibaba Cloud's billing rules and may incur corresponding charges. Please visit its official website or view the relevant documentation to confirm and accept its billing standards before proceeding. If you disagree, please do not proceed with the operation.
You have registered an OceanBase Cloud account, and have created an instance and a MySQL-compatible tenant. For details, refer to Create an instance and Create a tenant.
You have a prepared dataset. The example dataset used in this topic is from Kaggle.
Procedure
Step 1: Obtain an OceanBase Cloud connection string
Log in to the OceanBase Cloud console. On the Instances page, expand the target instance and click Create under the target tenant.
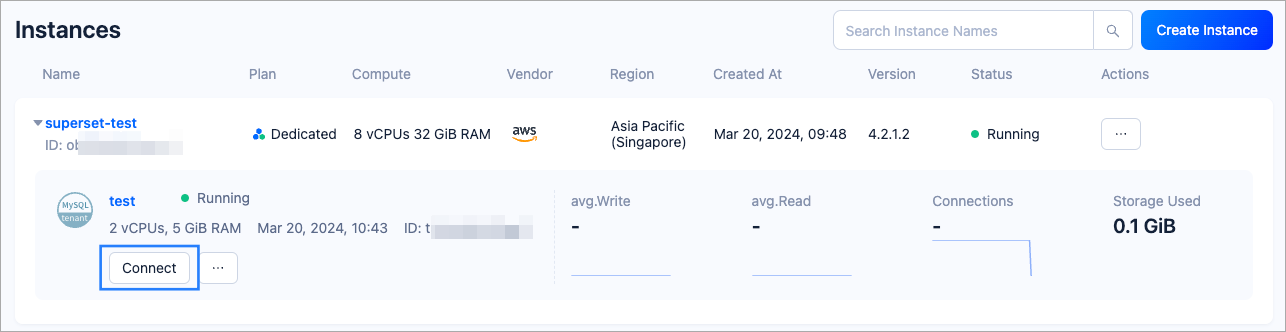
In the pop-up window, click Connect with Public IP.
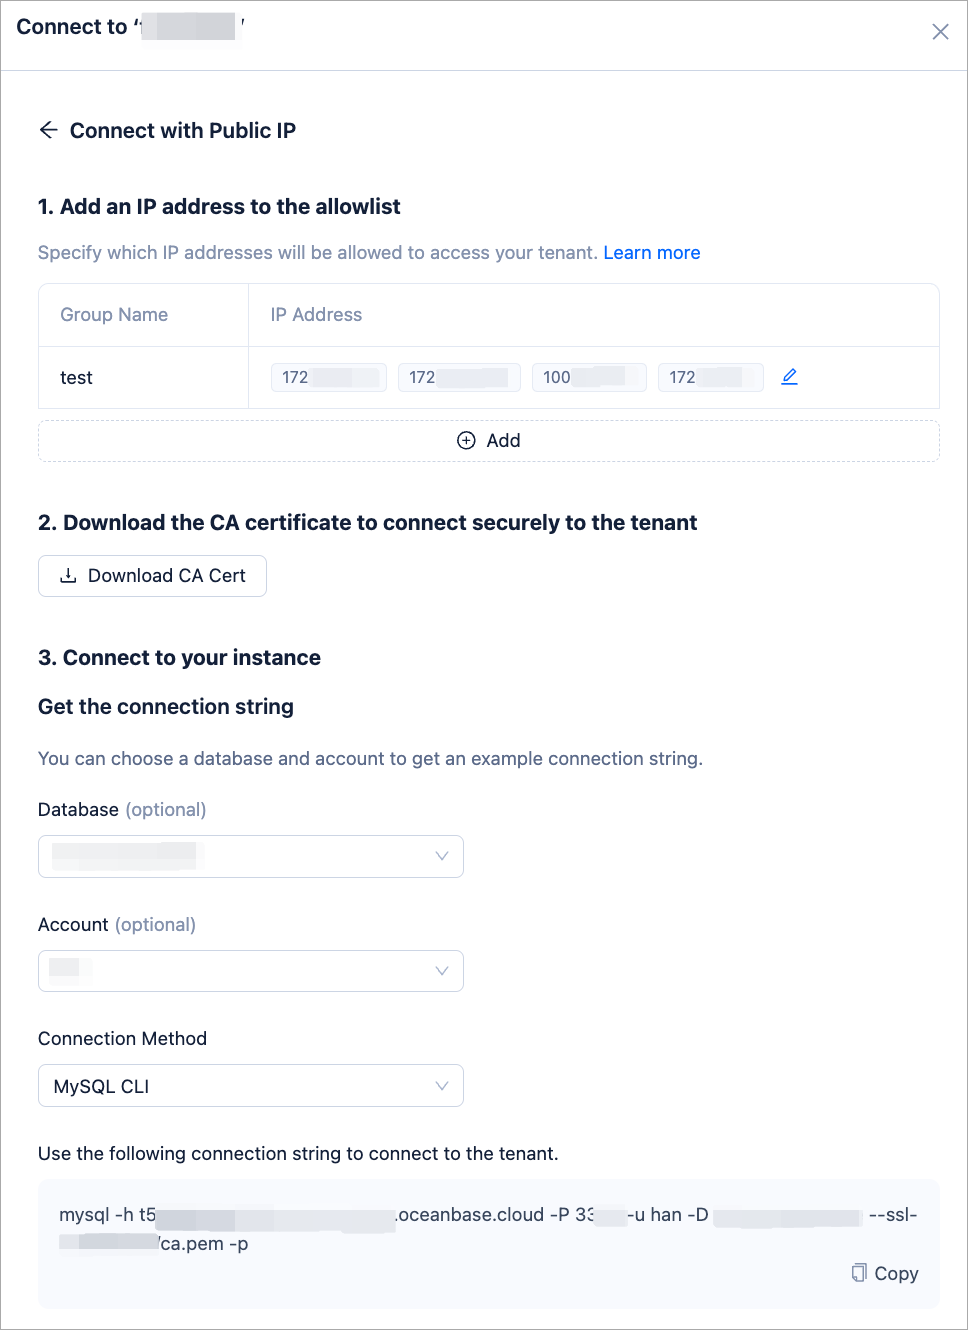
In the Connect with Public IP window, complete the following settings to generate the connection string:
- Under 1. Add an IP address to the allowlist, click Add to add your exit IP address(es) used for the connection to the allowlist.
- (Optional) Under 2. Download the CA certificate to connect securely to the tenant, download the CA certificate and complete the verification.
- Under 3. Connect to your instance, click the drop-down list for Database and Account to create a database and an account for the connection. Select MySQL CLI as the connection method.
Notice
Please keep your password in a secure place after creating your account.
Step 2: Import data and create tables
Open SQL Console in the OceanBase Cloud console and create tables using the following table creation statement. For detailed steps on creating tables with the SQL Console, refer to Create a table.
CREATE TABLE `test` (
`invoice_no` varchar(50) DEFAULT NULL,
`stock_code` varchar(20) DEFAULT NULL,
`description` varchar(200) DEFAULT NULL,
`quantity` int(11) DEFAULT NULL,
`invoice_data` datetime DEFAULT NULL,
`unit_price` decimal(8,2) DEFAULT NULL,
`customer_id` int(11) DEFAULT NULL,
`country` varchar(50) DEFAULT NULL,
`sales` float DEFAULT NULL
) DEFAULT CHARSET = utf8mb4
Use Load Data to import your prepared dataset into the table just created. For detailed steps on importing data with Load Data, see Import data.
Step 3: Connect to OceanBase Cloud in Power BI
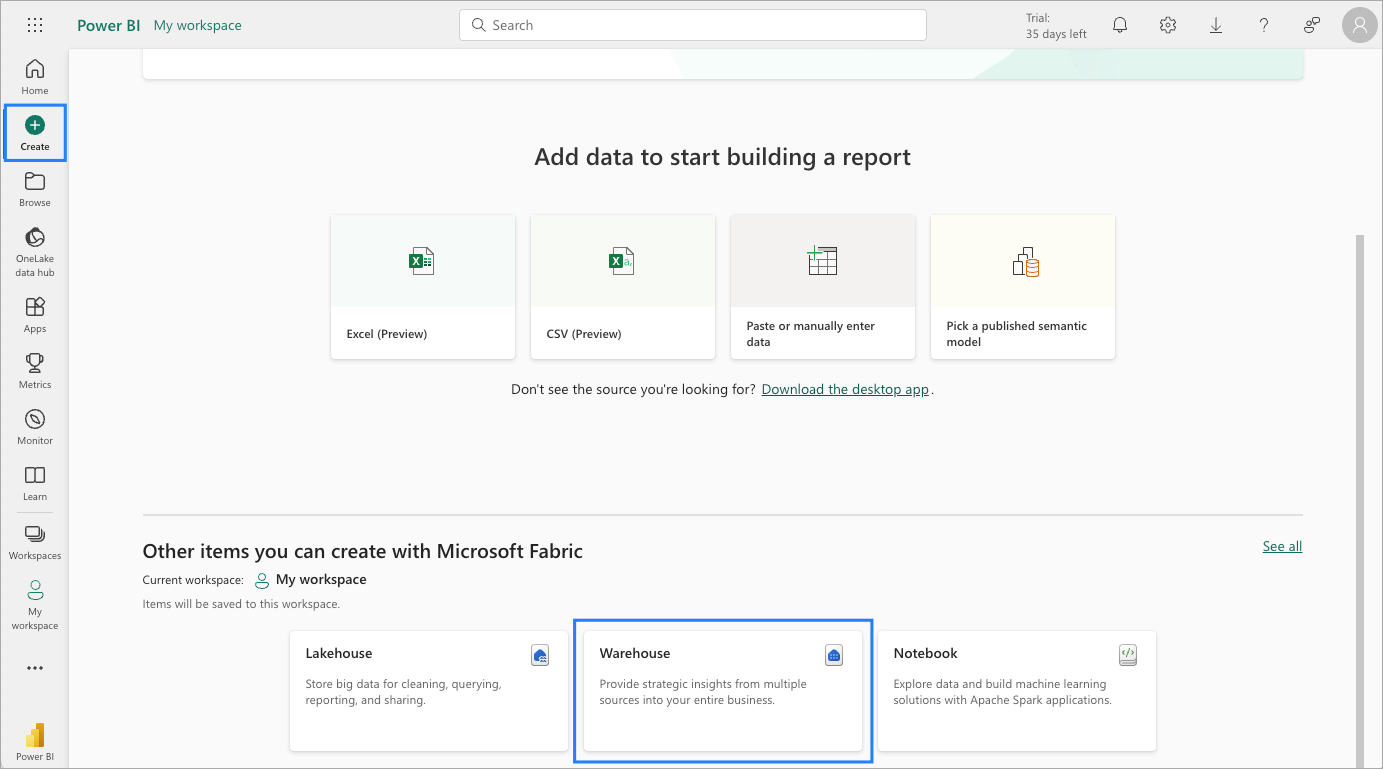
Open the Power BI console. In the left menu, select Create, then select Warehouse on the main panel to create a new warehouse. Name your warehouse oceanbase.
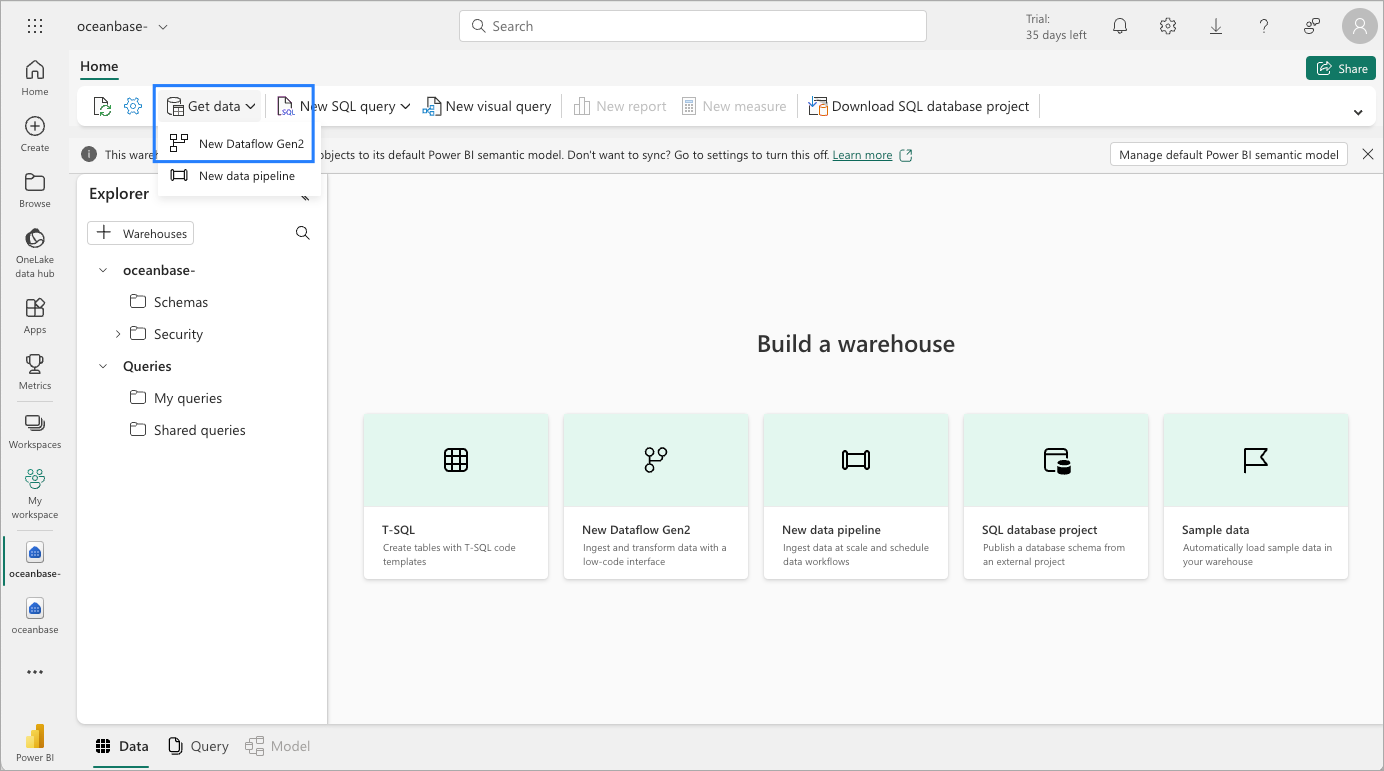
Enter the newly created warehouse oceanbase, and select Get data > New Dataflow Gen2.
In the pop-up box, search for mysql, select MySQL Database, and configure as follows:
Based on the connection string obtained in Step 1: Obtain an OceanBase Cloud connection string, fill in the information. The OceanBase Cloud database connection string format is
mysql -h {$host} -P 3306 -u {$user} -D {$database} -p. For example:- Server: Enter as
{$host}:3306 - Database: Enter the database where the table created in Step 2 resides
- Username:
{$user}
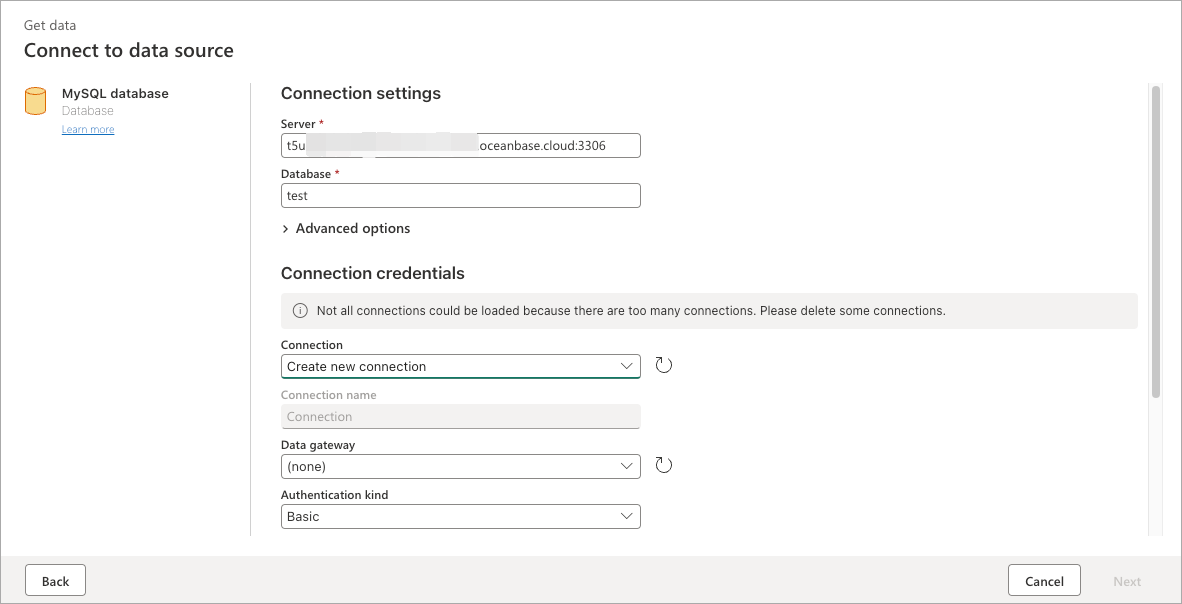
- Server: Enter as
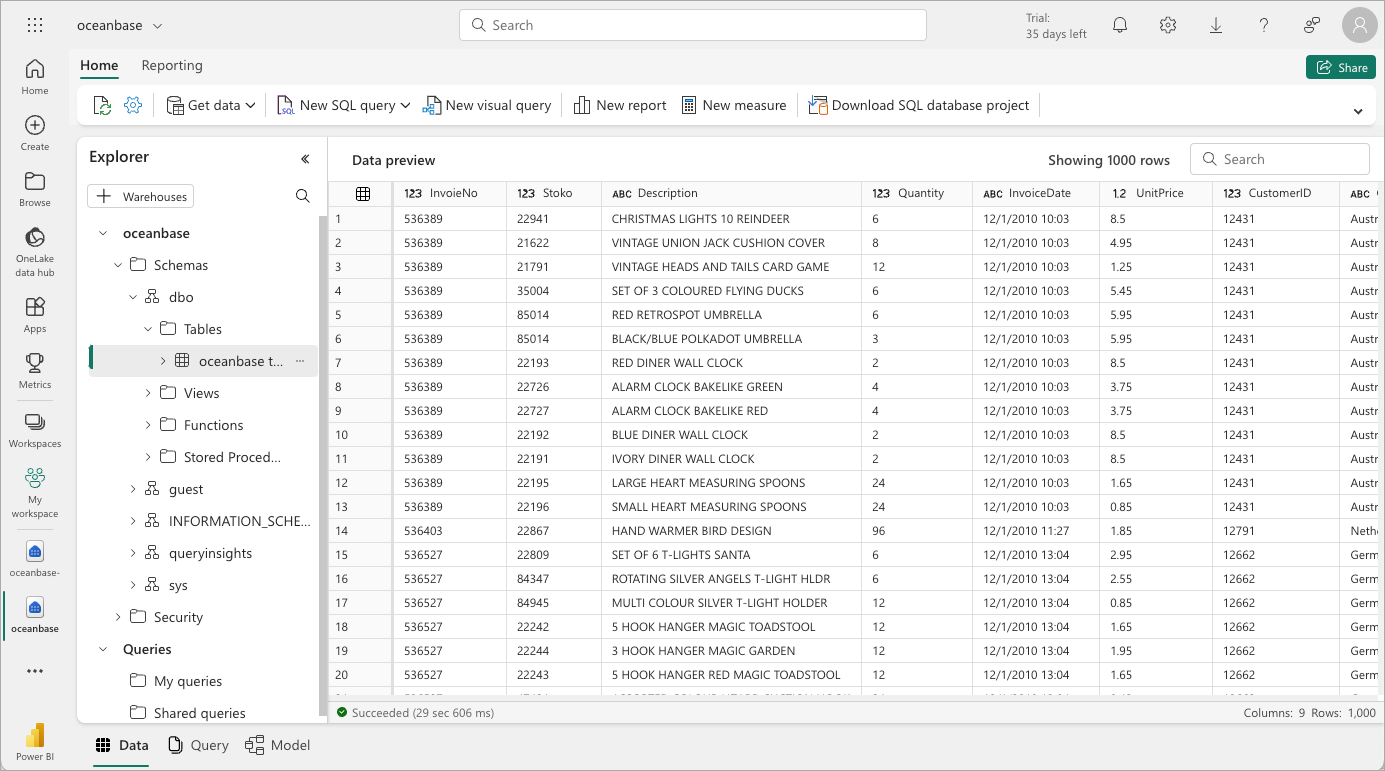
Click Next. Once connected successfully, choose Select Data > MySQL Database, double-click your database, and the table data will be displayed as shown below:
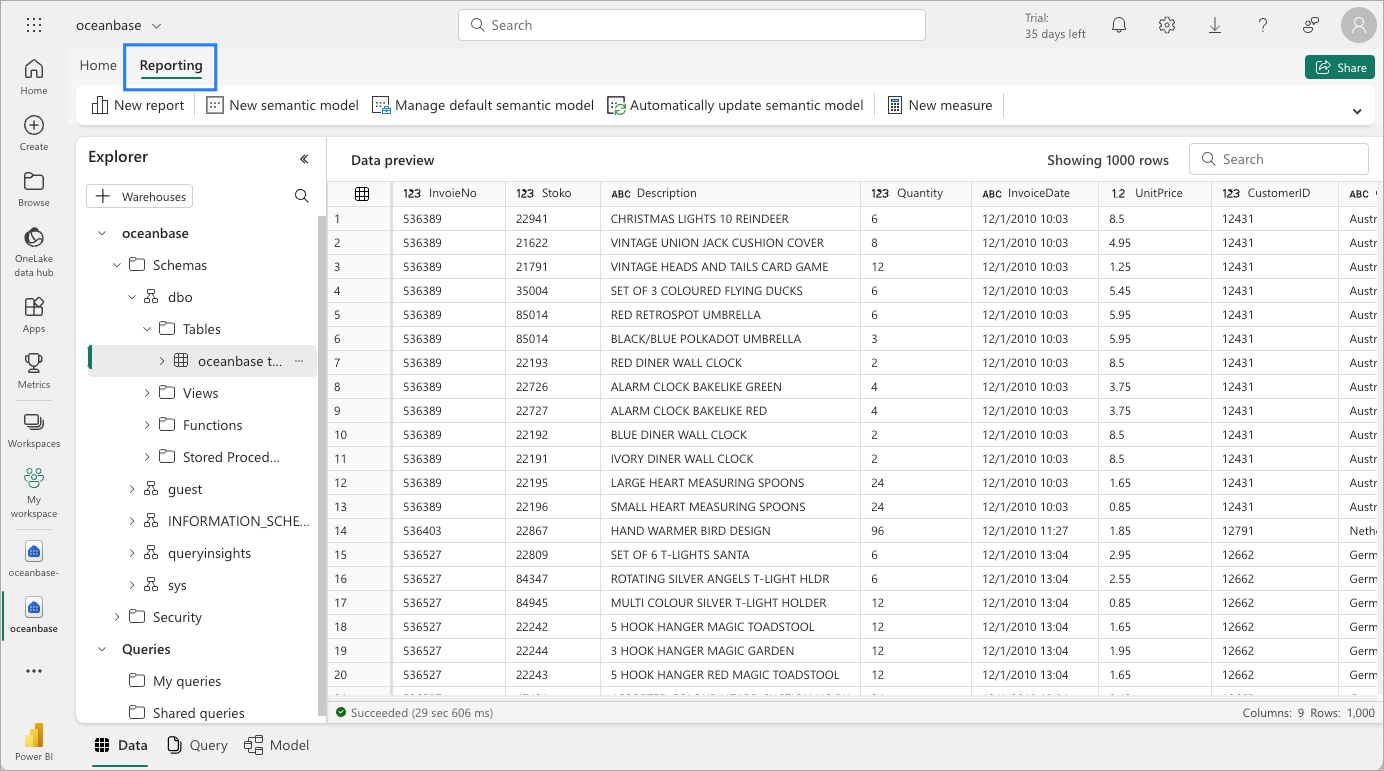
You can try auto-generating a report to experience Power BI. Switch to the Reporting > Manage default semantic model tab.
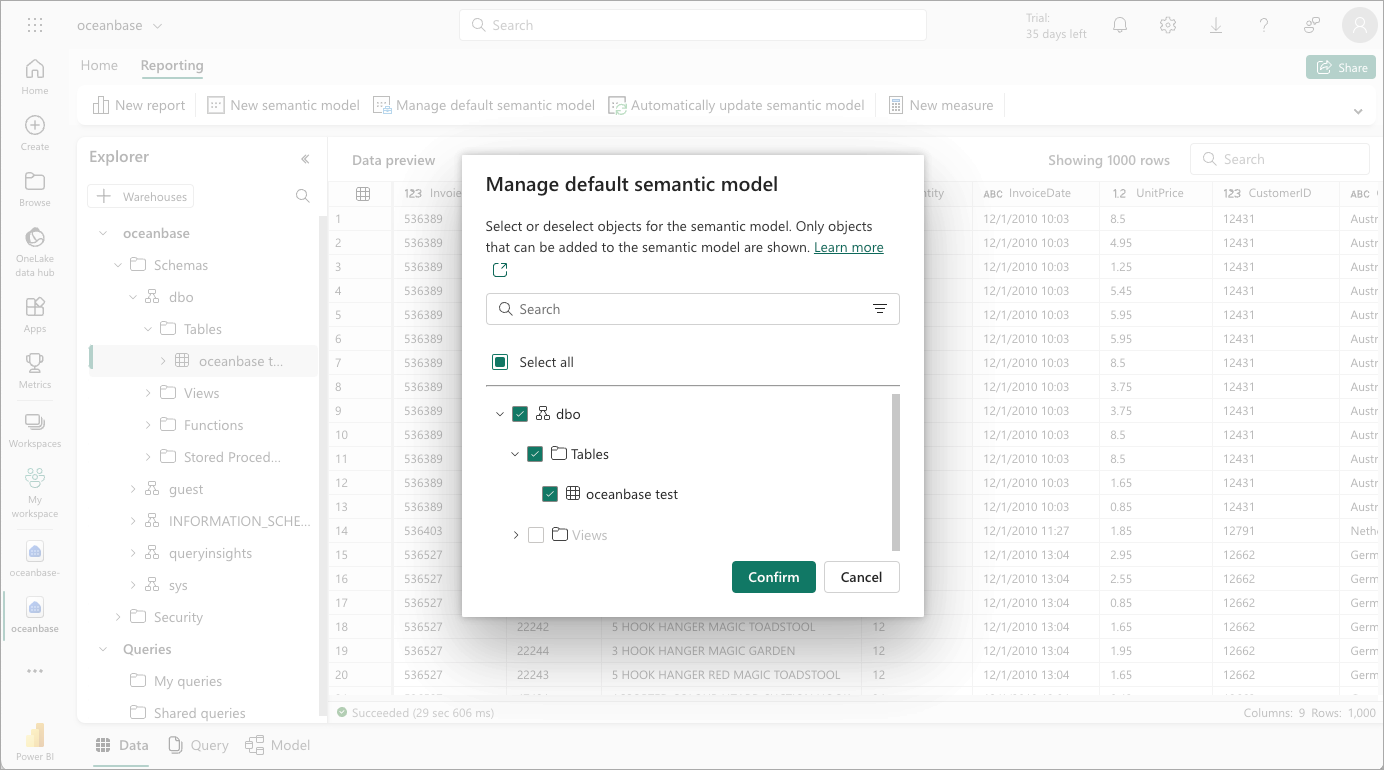
In the Manage default semantic model window that pops up, select your table, click Confirm, wait a moment, and the auto-generated report will appear.
What's next
After creating the data source, you can start using Power BI. For detailed operating instructions, refer to the Power BI documentation.