
DBeaver is a general-purpose database client for relational, non-relational, and distributed databases. This topic explains how to connect to your OceanBase Cloud database using DBeaver.
Prerequisites
You have downloaded and installed DBeaver.
You have an OceanBase Cloud account and have created a transactional instance and the target tenant. For details, see Create a cluster instance and Create a tenant.
For a MySQL-compatible tenant, you have created a database and an account with read and write access. For an Oracle-compatible tenant, you only need an account with read and write access. For details, see Create an account and Create a database (MySQL only).
You have the Project Admin or Instance Admin role so you can read and write data on instances in the project. If you do not, ask your organization administrator to grant the required permissions.
Oracle-compatible tenants only: You have downloaded OceanBase Connector/J from the OceanBase Download Center so you can add it in DBeaver's Driver Manager as described below.
Step 1: Get an OceanBase Cloud connection string
Log in to the OceanBase Cloud console. On the instance list, expand the target transactional instance. Under the target tenant, choose Connect > Get Connection String.
In the dialog, select Public Network.
On the Connect via Public Network page, complete the following to generate a connection string:
(Optional) If the tenant does not have a public endpoint yet, under Step 1: Get Public Endpoint, click Get Public Endpoint. If one already exists, skip this step. After the endpoint is ready, click Next Step.
Under Step 2: Security Settings, click Add to configure the allowlist as needed, then click Next Step.
Under Step 3: Access Database, set options according to your tenant mode:
MySQL-compatible tenant: Select the database and account you created in the prerequisites, and choose MySQL CLI as the connection method. Then copy the connection string for the next section.
Oracle-compatible tenant: Select the account you created in the prerequisites, and choose OBClient as the connection method. Then copy the connection string for the next section.
Step 2: Connect to OceanBase Cloud in DBeaver
Note
DBeaver's UI varies by version. The steps below use DBeaver Community Edition 24.0.1 as an example. For other versions, refer to that version's documentation.
MySQL-compatible tenant
Open DBeaver and click
 to open Select your database.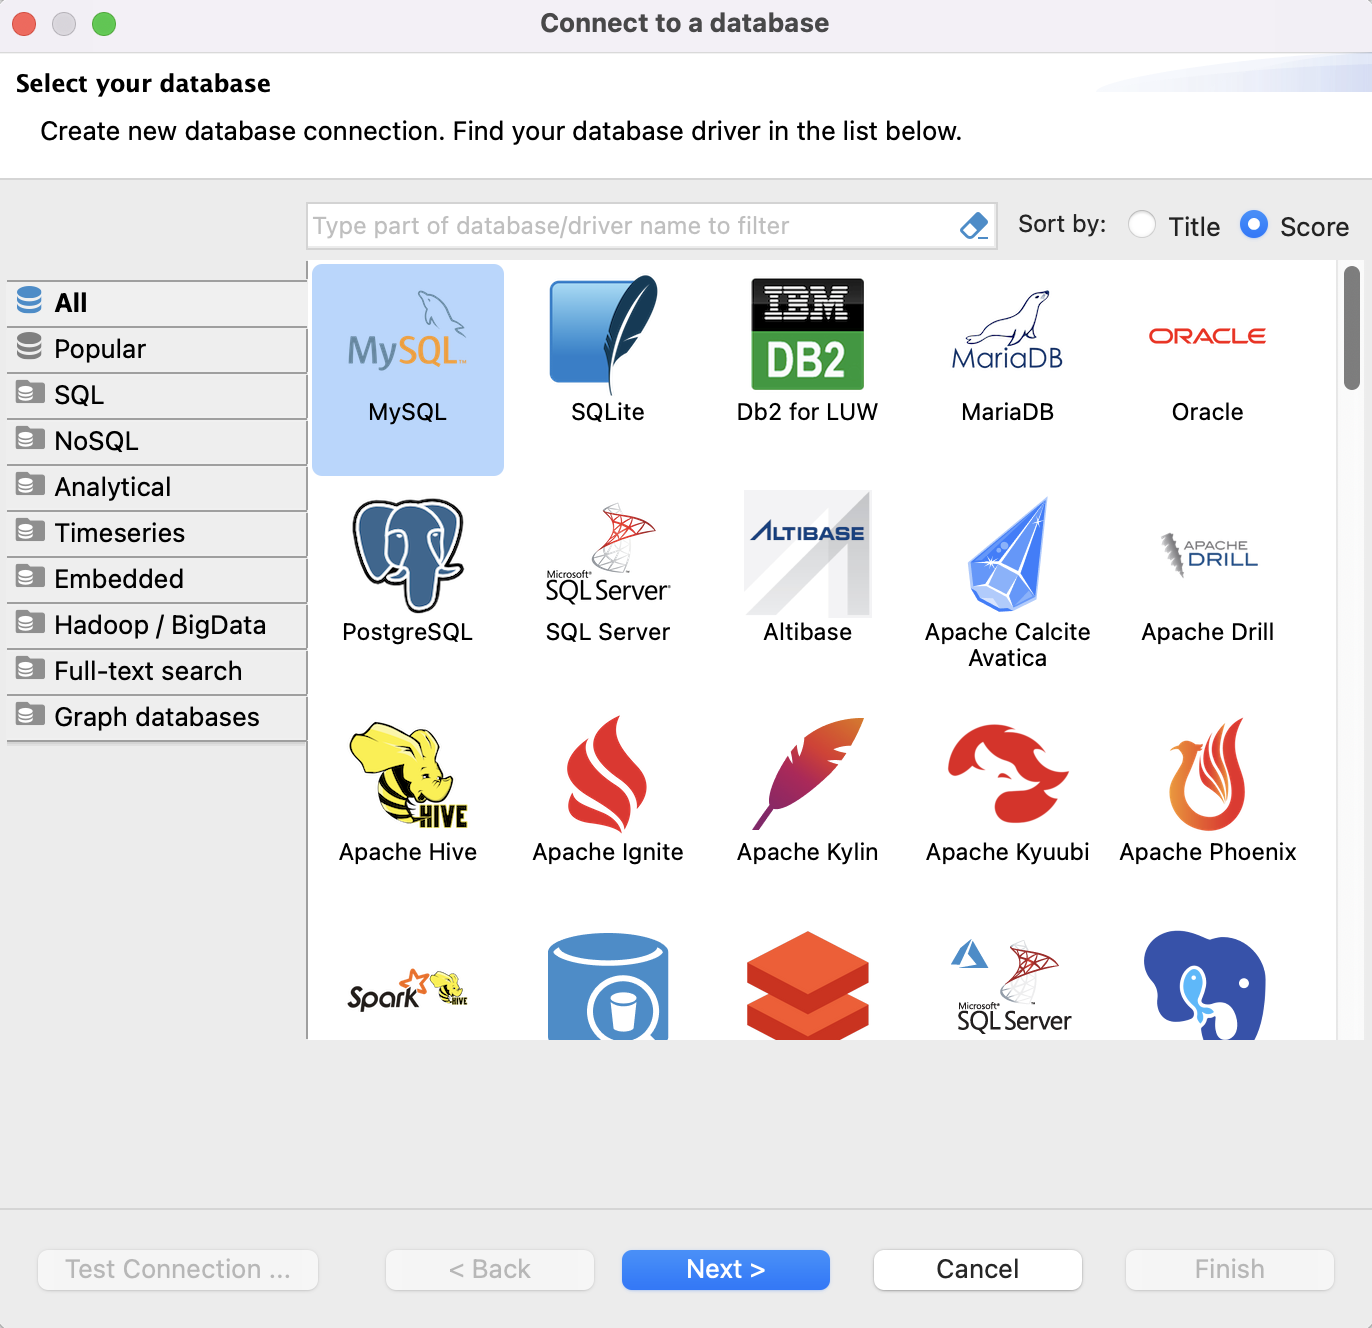
Select MySQL, then click Next to open Connection Settings.
On the Main tab of Connection Settings, map fields from the connection string you copied in Step 1: Get an OceanBase Cloud connection string:
FieldDescriptionConnect by Select Host. Server Host The -hvalue in the connection string: the OceanBase Cloud hostname, for examplet5******.aws-ap-southeast-1.oceanbase.cloud.Port The -Pvalue in the connection string: the OceanBase Cloud port.Database The -Dvalue in the connection string: the database name.Username The -uvalue in the connection string: the account name, for exampletest.Password The -pvalue in the connection string: the account password.
Click Test Connection. If the dialog shows Connected, the database connection succeeded.

Note
If the MySQL driver is not installed yet, DBeaver prompts you to install it. Follow the prompts, then run Test Connection again.
Click OK to close the dialog, then click Finish.
In Database Navigator, double-click the database connection you just added. If it expands as shown below, you are connected to OceanBase Cloud.

Oracle-compatible tenant
Note
Oracle-compatible tenants require the OceanBase JDBC driver and a custom driver definition in DBeaver. Wording and layout may differ slightly in other DBeaver versions; use your on-screen UI as the source of truth.
1. Configure the driver
In the DBeaver menu bar, choose Database > Driver Manager.
In Driver Manager, click New.
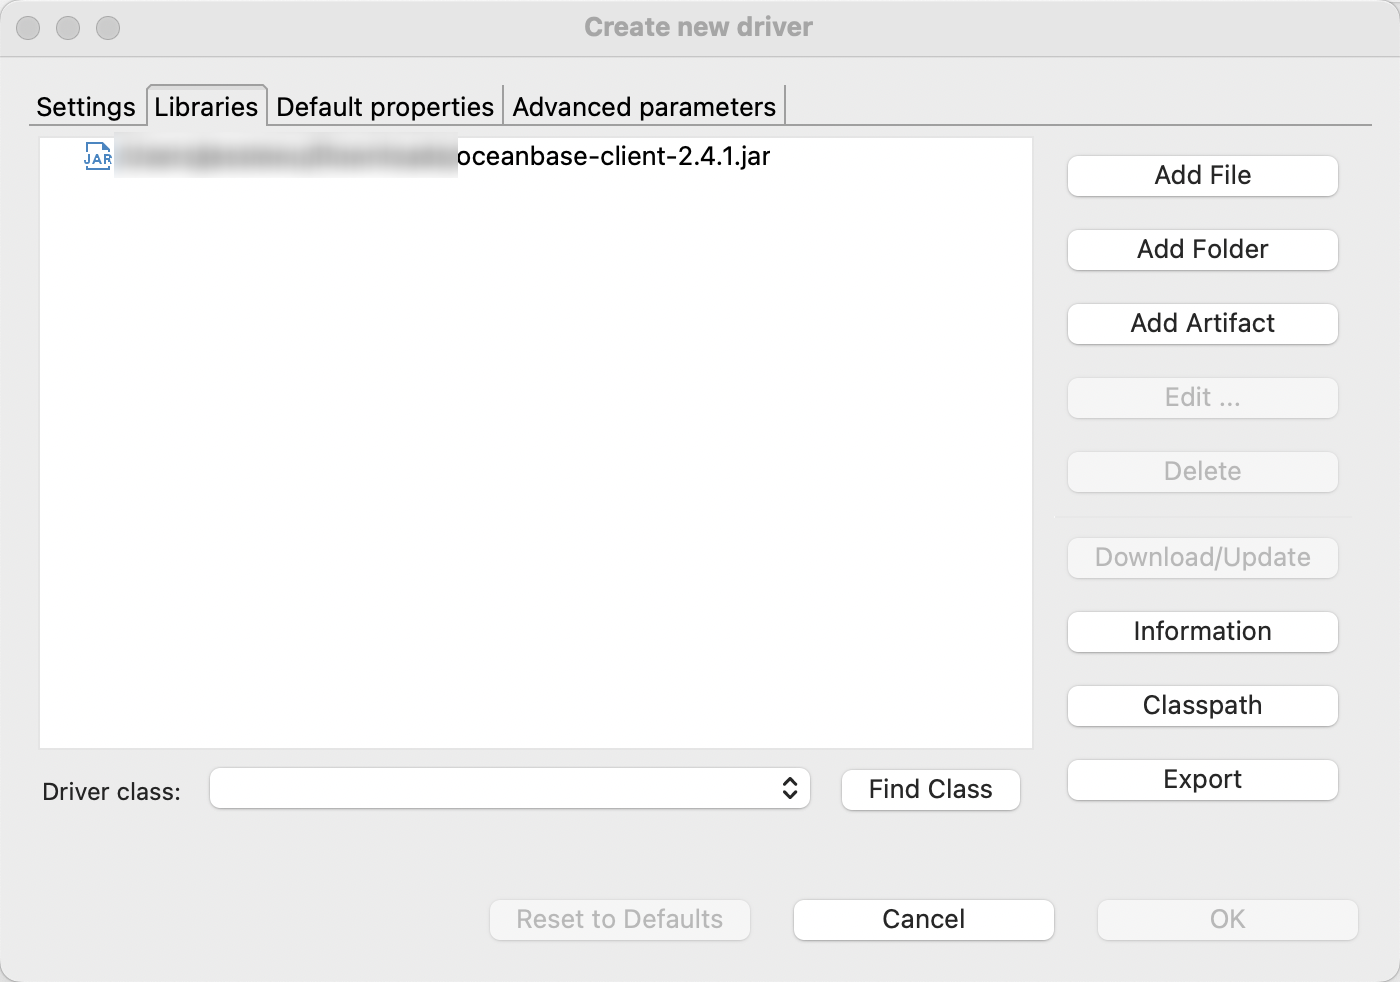
On the Libraries tab of Create new driver, click Add File and select the OceanBase JDBC JAR you downloaded in the prerequisites.
Switch to the Settings tab and enter the following:
FieldDescriptionDriver name A label you choose, for example OceanBase - Oracle.Driver type Select Generic. Class name com.oceanbase.jdbc.DriverURL template jdbc:oceanbase://{host}:{port}[/{database}]Default port Same as the port in your Step 1 connection string. 1521 is typical for public connections to Oracle-compatible tenants. 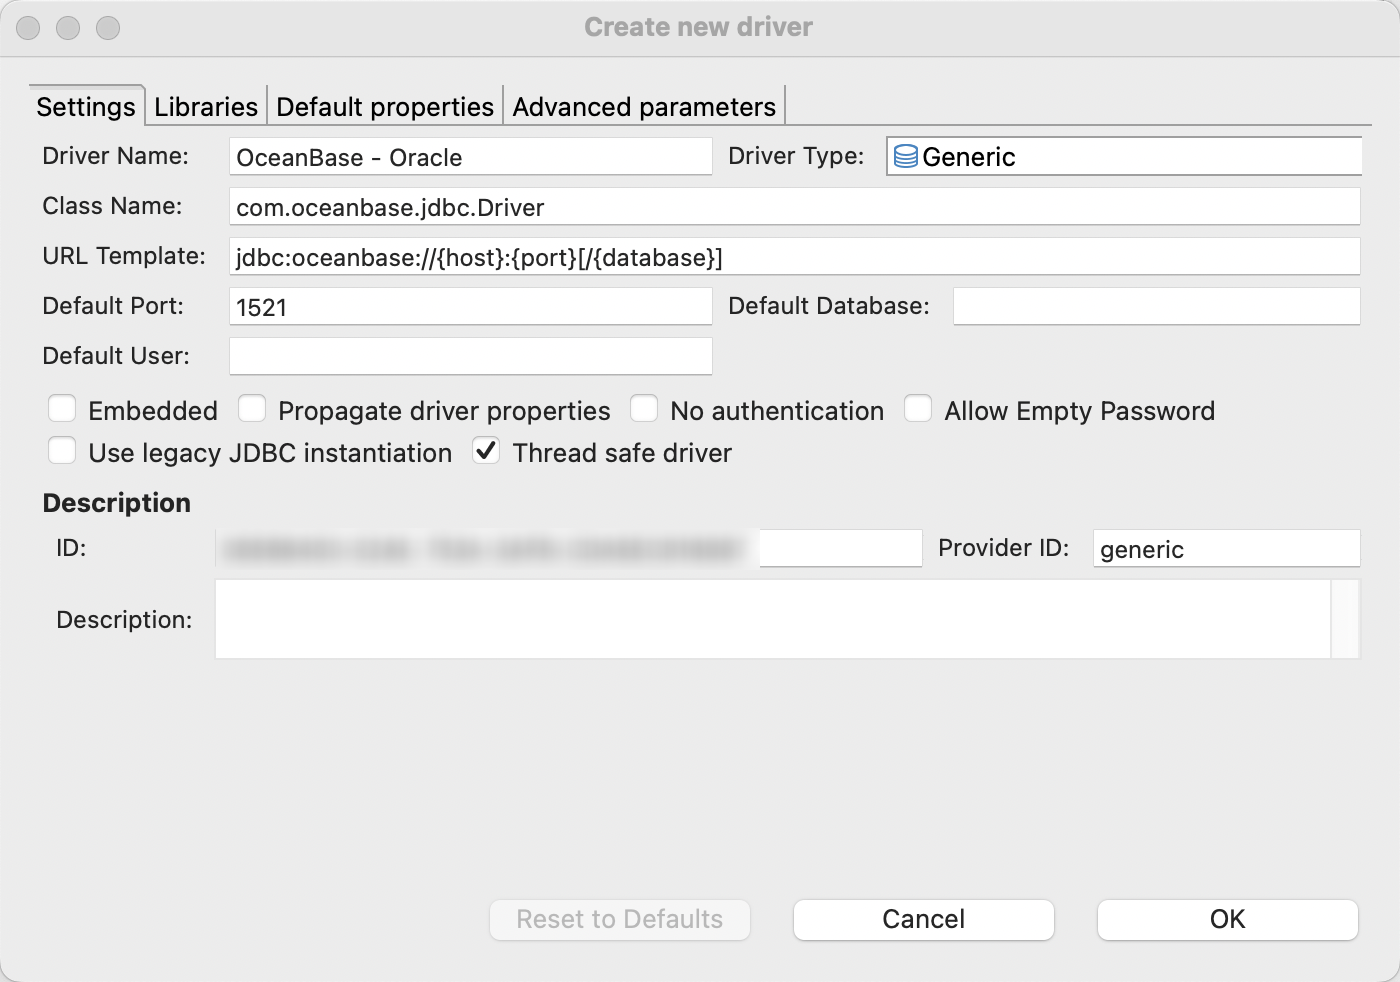
Click OK to save the driver.
2. Create the connection
In DBeaver, click
to open Select your database.Select the driver you defined (for example OceanBase - Oracle), then click Next to open Connection Settings.
On the Main tab, map fields from the connection string you copied in Step 1 for your Oracle-compatible tenant:
FieldDescriptionConnect by Select Host. Server Host The -hvalue in the connection string: the OceanBase Cloud hostname, for examplet5******.aws-ap-southeast-1.oceanbase.cloud.Port The -Pvalue in the connection string: the OceanBase Cloud port.Database/Schema Optional. If the connection string includes -D, enter the database or schema name to use.Username The -uvalue in the connection string. In Oracle mode the name is often uppercase, for exampleTEST.Password The -pvalue in the connection string: the account password.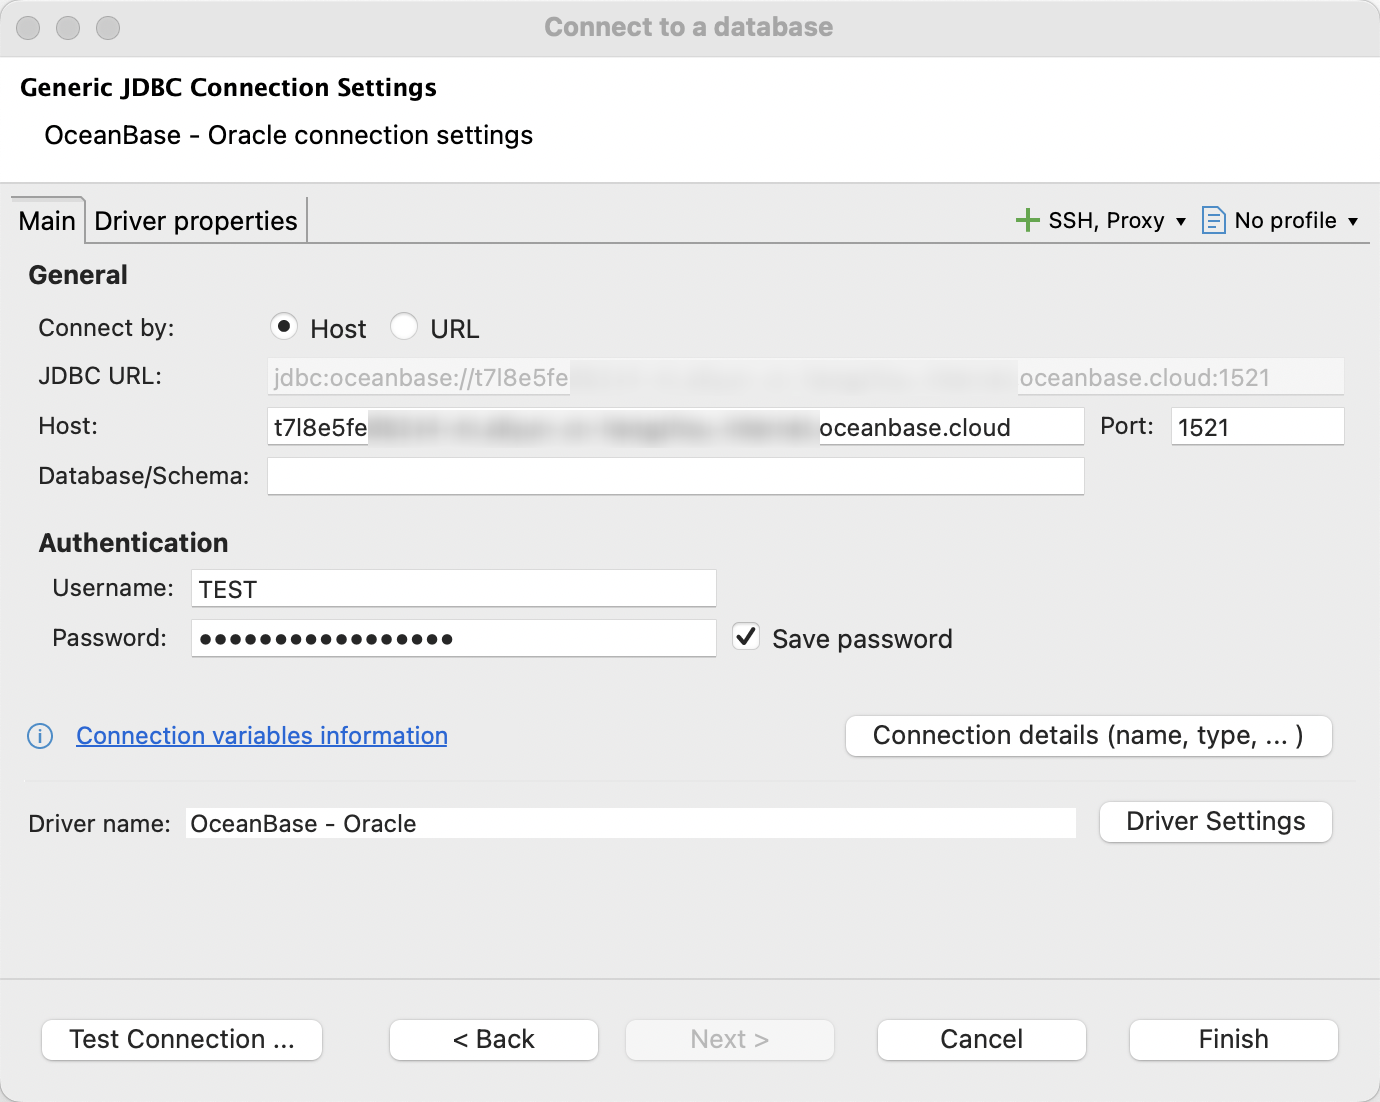
Click Test Connection. If the dialog shows Connected, the database connection succeeded.
Click OK to close the dialog, then click Finish.
In Database Navigator, double-click the connection you just added. If you see the expected objects, you are connected to OceanBase Cloud.
What's next
After you connect, you can work with your database in DBeaver. For more about DBeaver itself, see the DBeaver documentation.