
MCP (Model Context Protocol) is an open-source protocol released by Anthropic in November 2024. It enables large language models to interact with external tools or data sources. With MCP, users do not need to manually copy and execute the output of large models. Instead, the large models can directly instruct tools to perform corresponding actions.
OceanBase MCP Server provides the capability for large models to interact with OceanBase Database through the MCP protocol and execute SQL statements. With an appropriate client, you can quickly build a project prototype. It is open-sourced on GitHub.
Kiro is an integrated development environment (IDE) designed specifically for AI agents, launched by Amazon Web Services (AWS). It is an AI-powered programming tool that helps developers complete the entire development process from concept to production deployment.
This topic demonstrates how to use OceanBase MCP Server and Kiro to quickly build a backend application.
Prerequisites
A transactional instance is available in your environment. For instructions on how to create the instance, see Create an transactional instance.
You have created a MySQL-compatible tenant in the instance. For instructions on how to create the tenant, see Create a MySQL-compatible tenant.
You have a MySQL database and account available under the tenant, and you have granted read and write permissions to the database account. For more information, see Create an account and Create a database (MySQL only).
You are a project admin or instance admin and have the permissions required to read and write data in the instance. If not, contact your organization admin to grant the required permissions.
You have installed Python 3.11 or later and the corresponding pip. If your system has a low Python version, you can use Miniconda to create a new Python 3.11 or later environment. For more information, see Miniconda installation guide.
You have installed Git based on your operating system.
Windows: https://git-scm.com/downloads/win.
macOS: https://git-scm.com/download/mac.
Linux: https://git-scm.com/downloads/linux.
You have installed the Python package manager uv.
For macOS and Linux, you can install it using the standalone script:
curl -LsSf https://astral.sh/uv/install.sh | shFor Windows, use the following script:
irm https://astral.sh/uv/install.ps1 | iexAlternatively, you can install it using the platform-independent pip method:
pip install uv
After the installation is complete, you can run the
uv --versioncommand to verify whether the installation is successful:pip install uv uv --versionYou have installed the Kiro client:
You can download the Kiro client from the Kiro download page and install the version suitable for your operating system.
Step 1: Obtain the database connection information
Log in to the OceanBase Cloud console.
In the instance list page, expand the the information of the target instance.
Select Connect > Get Connection String under the target tenant.
In the pop-up window, select Public Network as the connection method.
Step 2: Configure OceanBase MCP Server
Clone the OceanBase MCP Server repository
Run the following command to download the source code to your local machine:
git clone https://github.com/oceanbase/awesome-oceanbase-mcp.git
Navigate to the source code directory:
cd awesome-oceanbase-mcp
Install dependencies
In the oceanbase_mcp_server directory, run the following command to create a virtual environment and install the dependencies:
uv venv
source .venv/bin/activate
uv pip install .
Configure OceanBase MCP Server in Kiro
Press Command + L (MacOS) to open the chat dialog box, click the gear icon in the lower left corner, and select Kiro Settings.
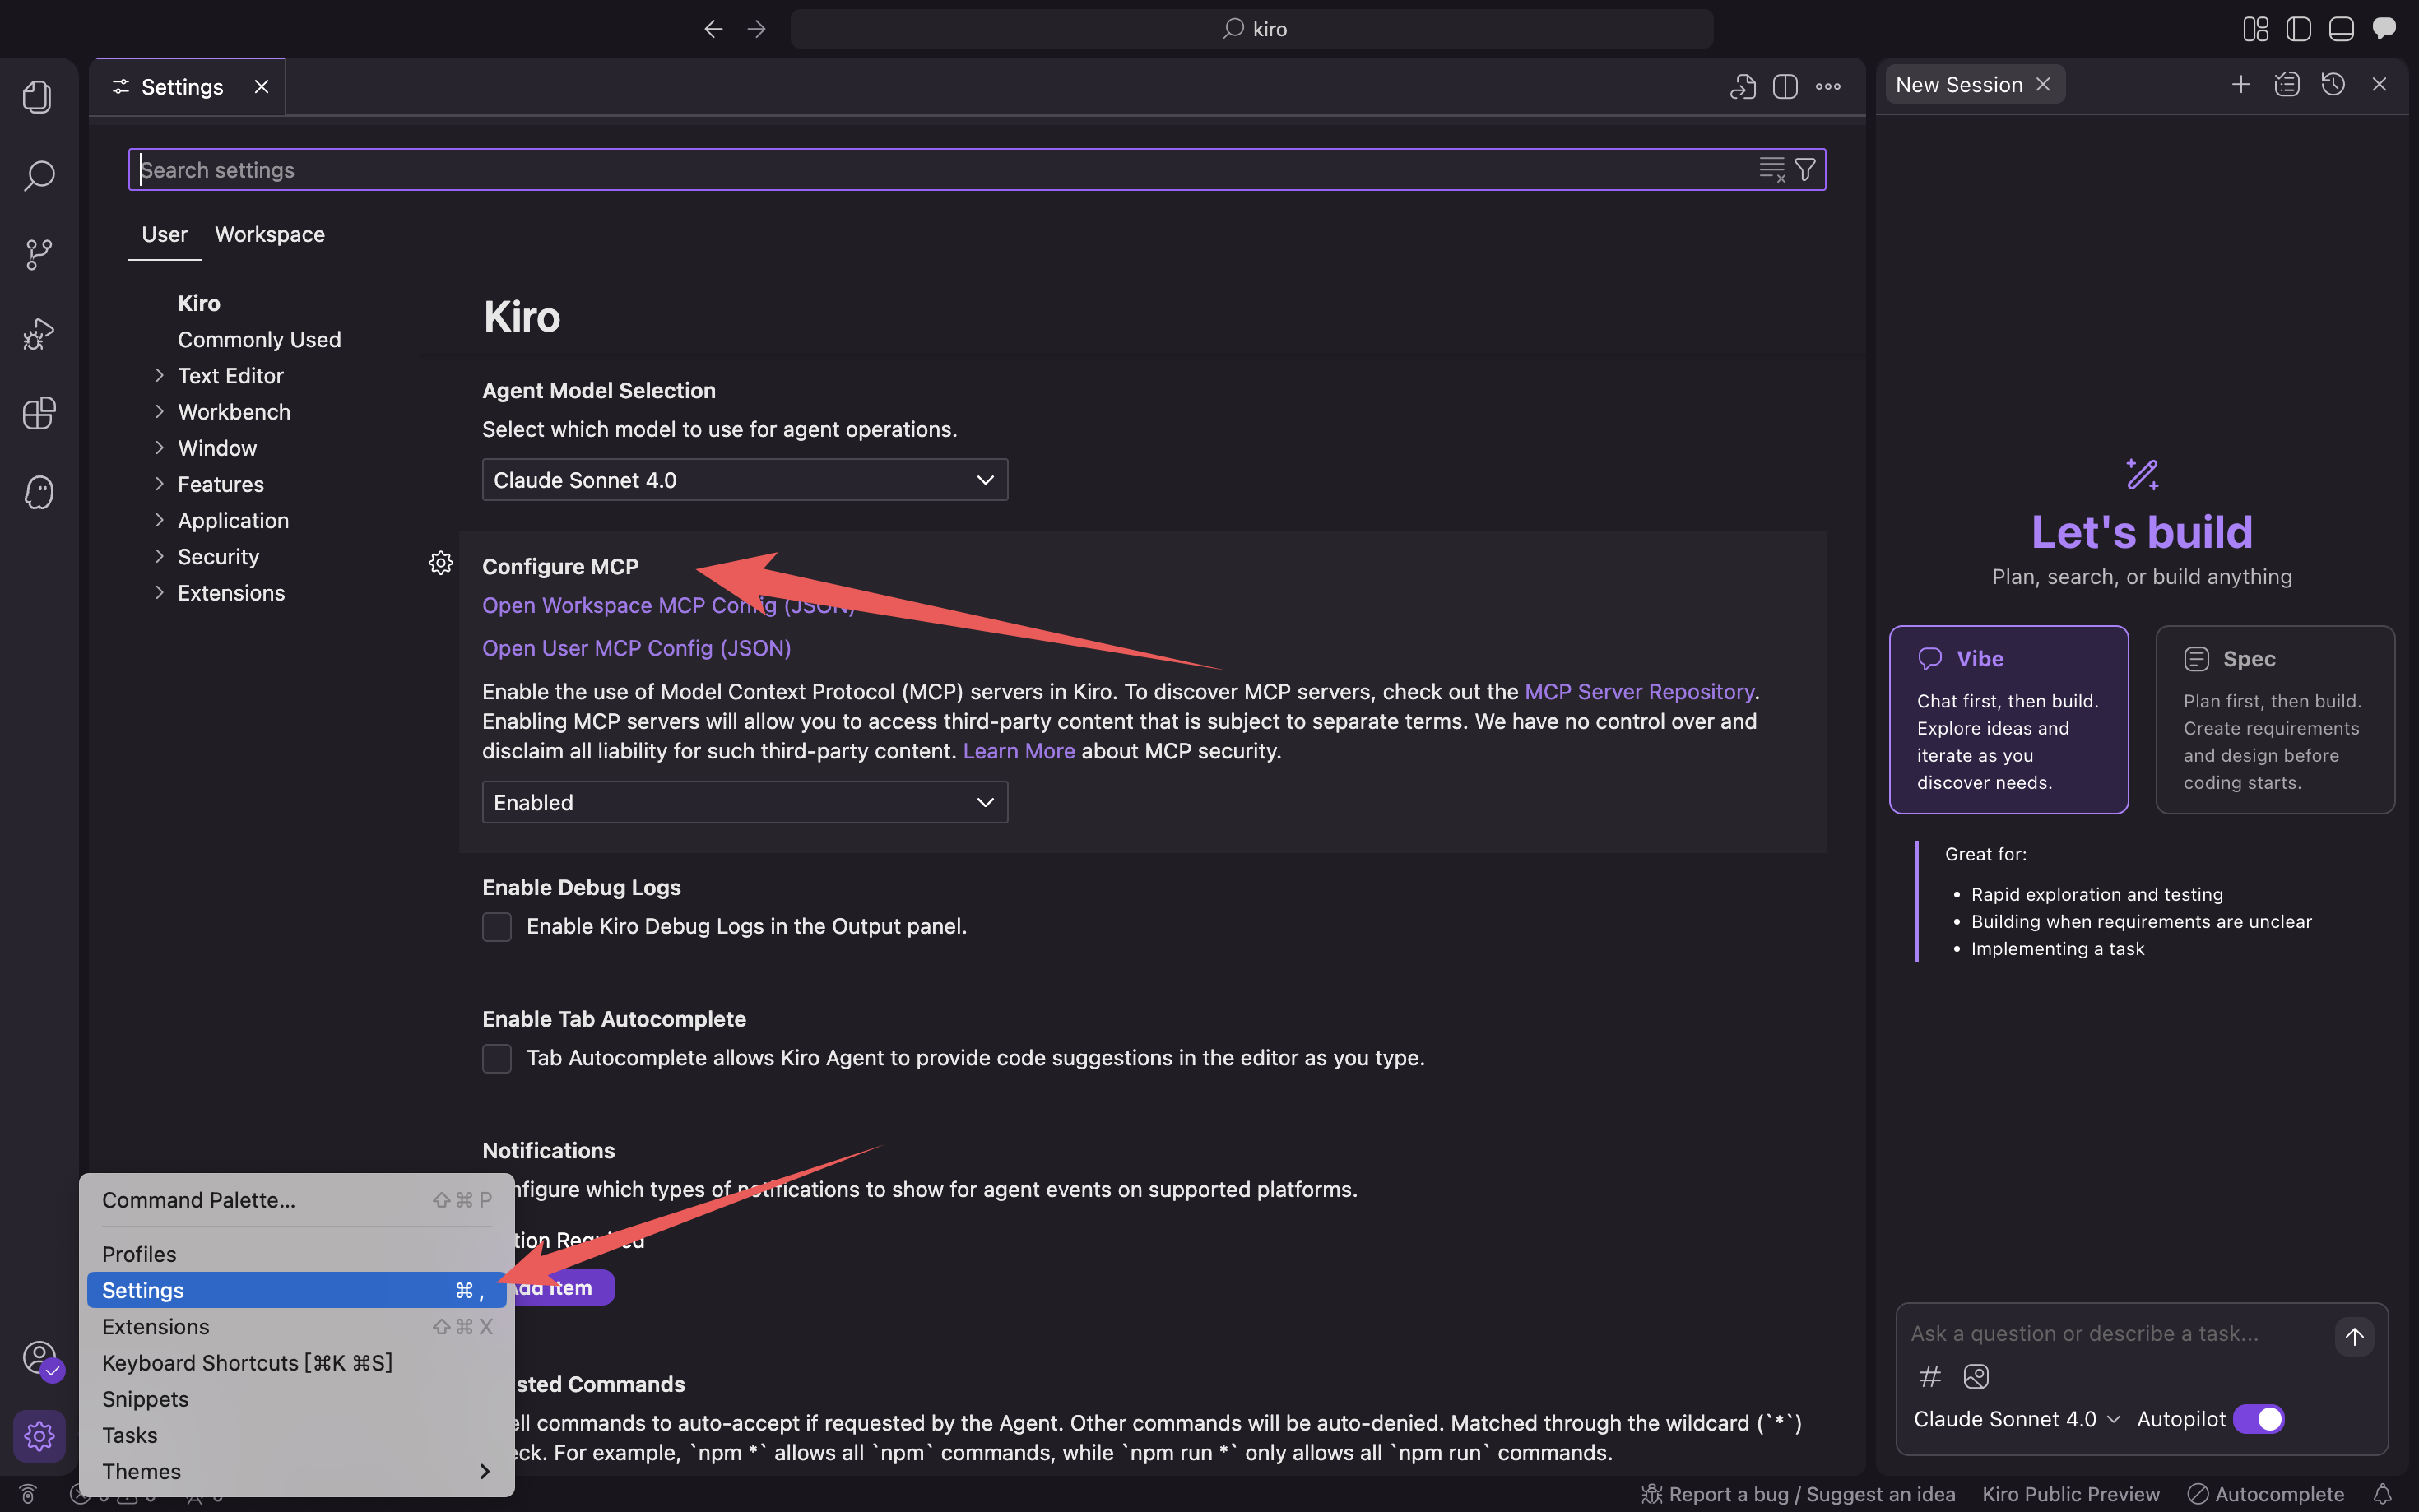
Click Open User MCP Config (JSON)/Open Workspace MCP Config (JSON) and fill in the MCP configuration file.

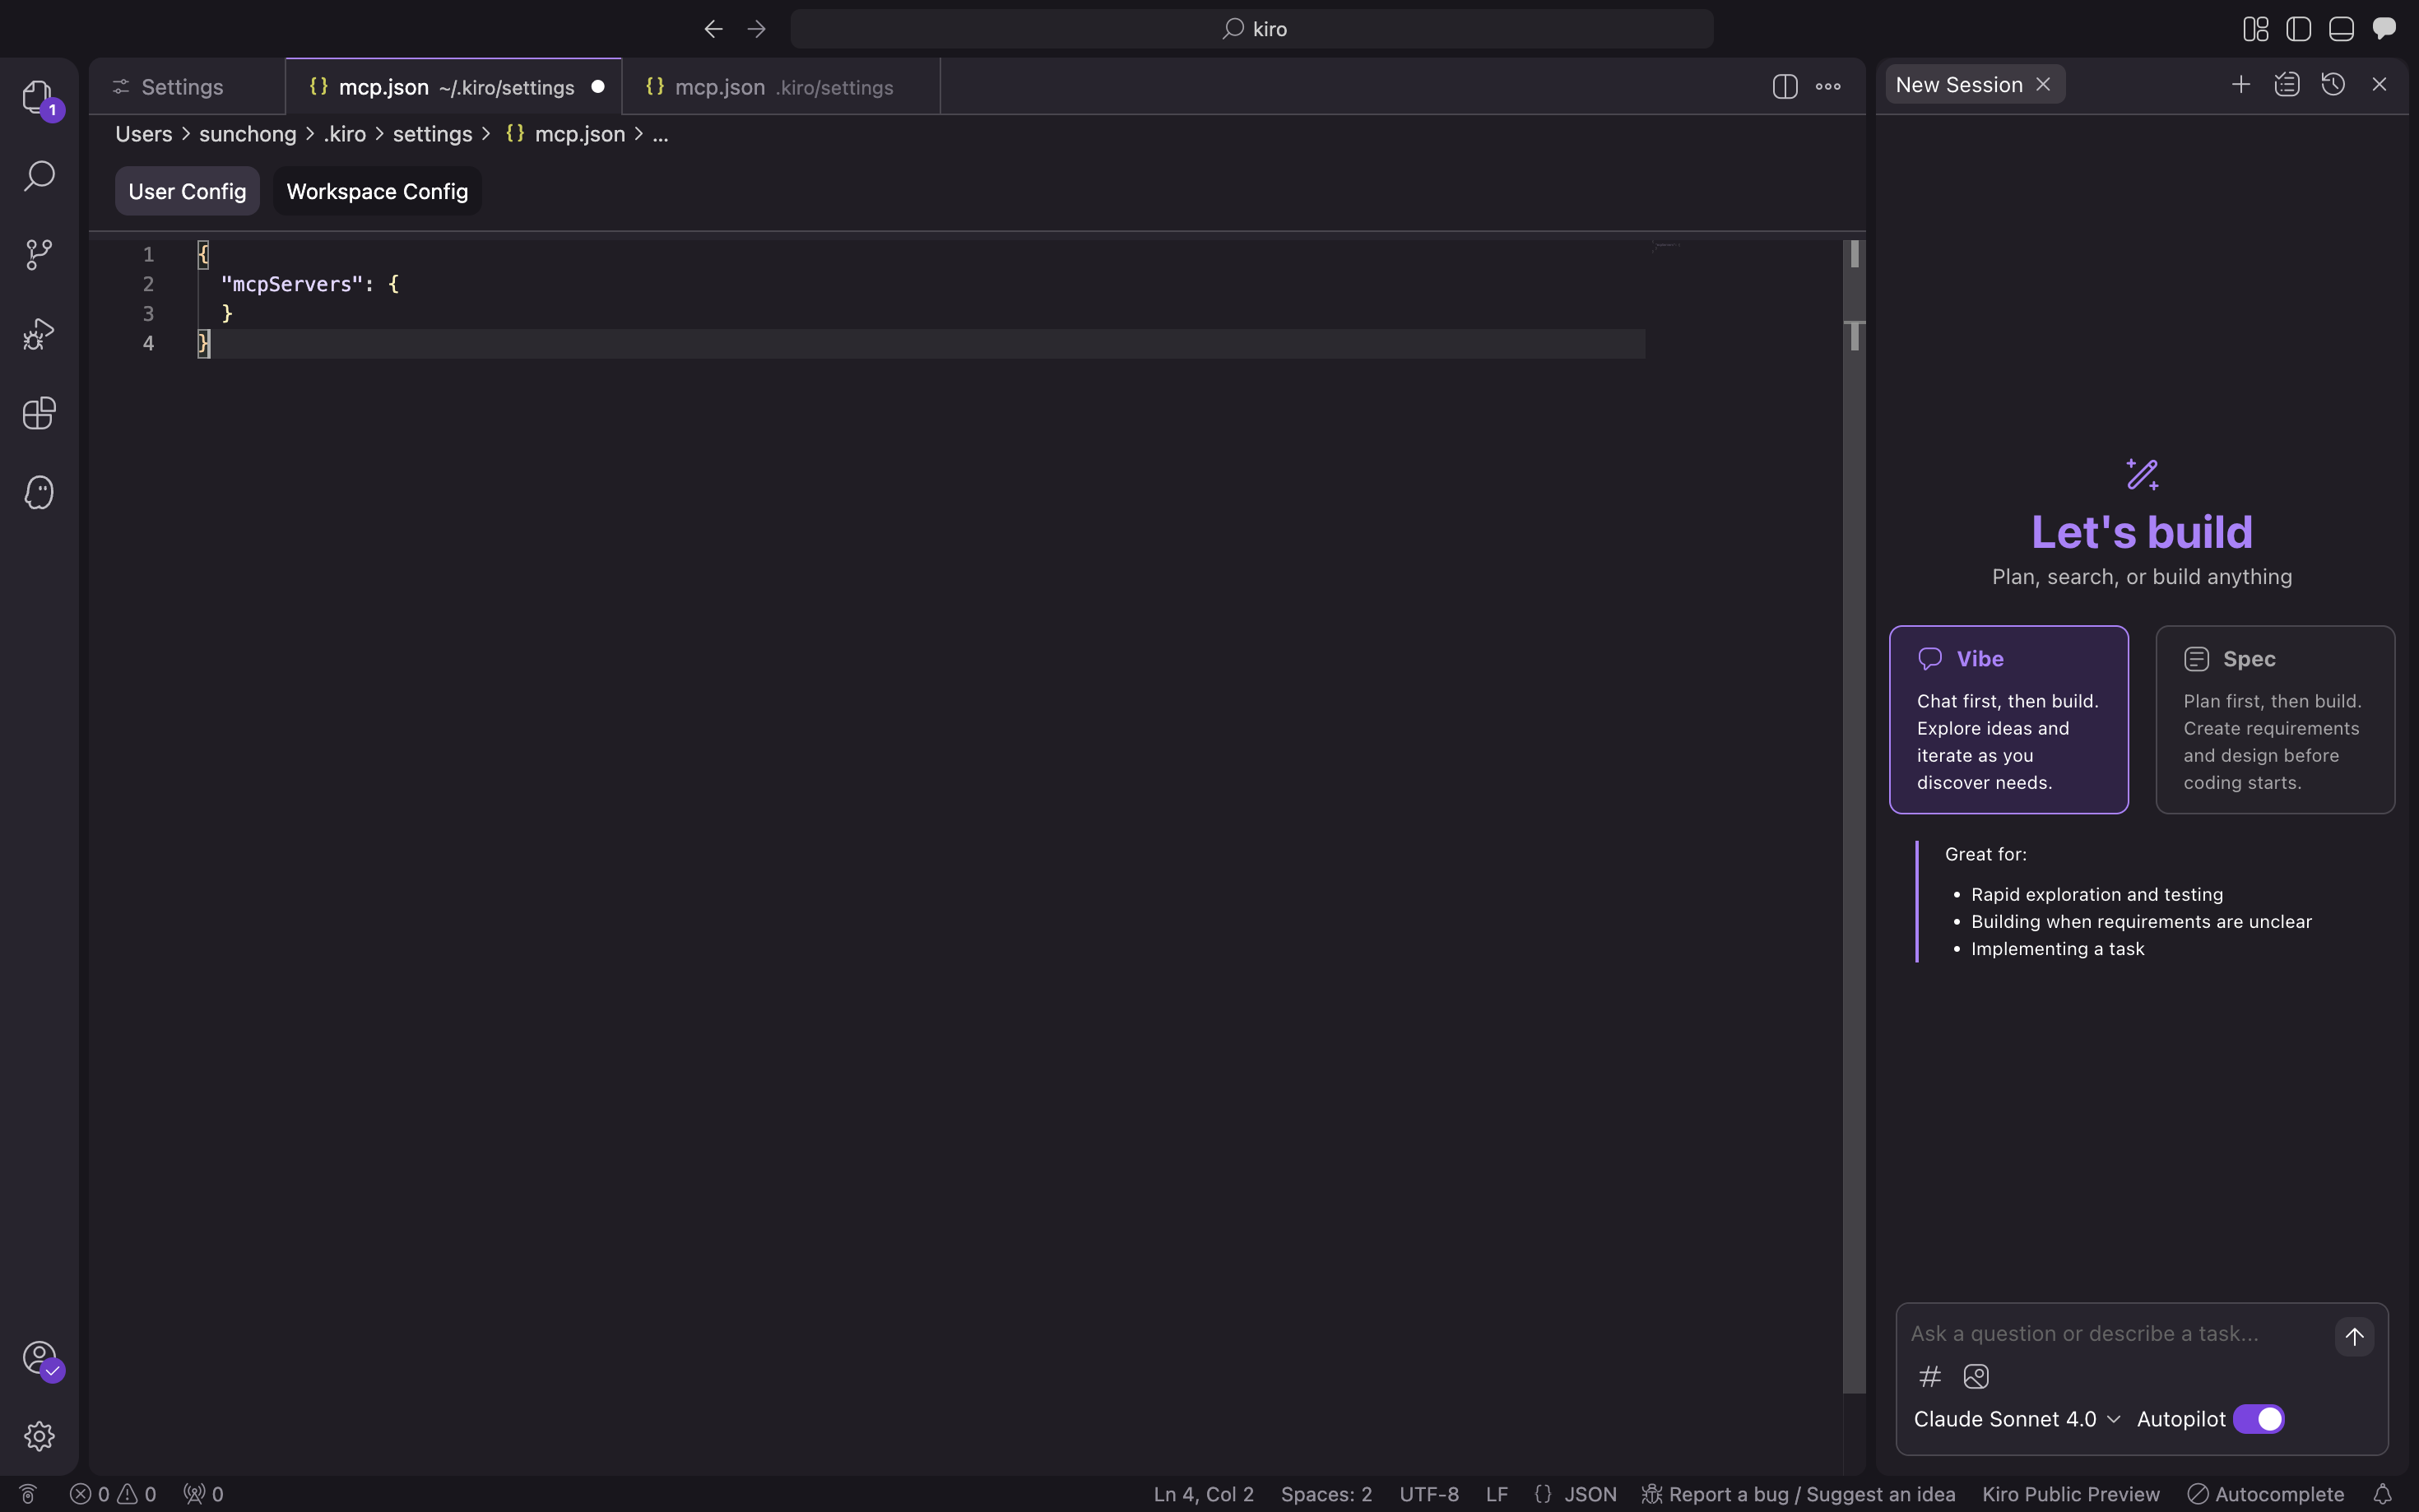
Enter the following configuration file and click Confirm. Replace
/path/to/your/oceanbase_mcp_serverwith the absolute path of theoceanbase_mcp_serverfolder. ReplaceOB_HOST,OB_PORT,OB_USER,OB_PASSWORD, andOB_DATABASEwith the corresponding information of your database:{ "mcpServers": { "oceanbase": { "command": "uv", "args": [ "--directory", "/path/to/your/oceanbase_mcp_server/src/oceanbase_mcp_server", "run", "oceanbase_mcp_server" ], "env": { "OB_HOST": "***", "OB_PORT": "***", "OB_USER": "***", "OB_PASSWORD": "***", "OB_DATABASE": "***" } } } }Verify whether you can connect to the database.
Enter "How many tables are in the test database?" in the prompt. Kiro will display the SQL statement to be executed and output the query result.
Kiro will display the number of tables in the test database, indicating that you can connect to the OceanBase database.
Step 3: Use FastAPI to create a project in the RESTful API style
FastAPI is a Python web framework that can be used to build RESTful APIs quickly.
- Create a table.
Enter the prompt "Create a customer table with ID as the primary key, and fields name, age, telephone, and location".
- Insert test data.
Enter the prompt "Insert 10 test data entries".
- Create a FastAPI project.
Enter the prompt "Create a FastAPI project and generate a RESTful API based on the customer table". Multiple files will be automatically generated. Click "Accept All" first. If there are any issues, you can make modifications later.
Since the files generated by AI may vary each time, the modification process is not shown here.
- Run the following command to create a virtual environment and install dependencies using the uv package manager in the current directory.
pip install -r requirements.txt
- Start the FastAPI project.
python3 main.py
- View the data in the table.
Run the command curl http://127.0.0.1:8000/customers in the command line, or use other request tools to view the data in the table:
   curl http://127.0.0.1:8000/customers
   [{"name":"Zhang San","age":28,"telephone":"13812345678","location":"Chaoyang District, Beijing","id":1},{"name":"Li Si","age":35,"telephone":"13987654321","location":"Pudong New Area, Shanghai","id":2},{"name":"Wang Wu","age":42,"telephone":"15612345678","location":"Tianhe District, Guangzhou","id":3},{"name":"Zhao Liu","age":29,"telephone":"18712345678","location":"Nanshan District, Shenzhen","id":4},{"name":"Qian Qi","age":33,"telephone":"13512345678","location":"Xihu District, Hangzhou","id":5},{"name":"Sun Ba","age":26,"telephone":"15987654321","location":"Jinjiang District, Chengdu","id":6},{"name":"Zhou Jiu","age":38,"telephone":"18612345678","location":"Jianghan District, Wuhan","id":7},{"name":"Wu Shi","age":31,"telephone":"13712345678","location":"Gulou District, Nanjing","id":8},{"name":"Zheng Shiyi","age":27,"telephone":"15812345678","location":"Yanta District, Xi'an","id":9},{"name":"Wang Shier","age":45,"telephone":"18512345678","location":"Yuzhong District, Chongqing","id":10}]
- The code for adding, deleting, modifying, and querying data has been generated.
   from database import db
   from models import CustomerCreate, CustomerUpdate
   from typing import List, Optional

class CustomerCRUD:

@staticmethod
    def get_all_customers() -> List[dict]:
        query = "SELECT * FROM customer ORDER BY id"
        return db.execute_query(query)

@staticmethod
    def get_customer_by_id(customer_id: int) -> Optional[dict]:
        query = "SELECT * FROM customer WHERE id = %s"
        result = db.execute_query(query, (customer_id,))
        return result[0] if result else None

@staticmethod
    def create_customer(customer: CustomerCreate) -> dict:
        query = """
        INSERT INTO customer (name, age, telephone, location)
        VALUES (%s, %s, %s, %s)
        """
        customer_id = db.execute_insert(
            query,
            (customer.name, customer.age, customer.telephone, customer.location)
        )
        return CustomerCRUD.get_customer_by_id(customer_id)

@staticmethod
    def update_customer(customer_id: int, customer: CustomerUpdate) -> Optional[dict]:
        # Build a dynamic update query
        update_fields = []
        params = []

if customer.name is not None:
            update_fields.append("name = %s")
            params.append(customer.name)
        if customer.age is not None:
            update_fields.append("age = %s")
            params.append(customer.age)
        if customer.telephone is not None:
            update_fields.append("telephone = %s")
            params.append(customer.telephone)
        if customer.location is not None:
            update_fields.append("location = %s")
            params.append(customer.location)

if not update_fields:
            return CustomerCRUD.get_customer_by_id(customer_id)

query = f"UPDATE customer SET {', '.join(update_fields)} WHERE id = %s"
        params.append(customer_id)

db.execute_query(query, tuple(params))
        return CustomerCRUD.get_customer_by_id(customer_id)

@staticmethod
    def delete_customer(customer_id: int) -> bool:
        query = "DELETE FROM customer WHERE id = %s"
        db.execute_query(query, (customer_id,))
        return True

customer_crud = CustomerCRUD()
    ```