OceanBase
English日本語简体中文
Docs Home
Products
Integrations
Release Notes

Databases

OceanBase DatabaseOceanBase Cloud OceanBase Best Practices

Tools

OceanBase Cloud PlatformOceanBase Migration ServiceOceanBase Developer CenterOceanBase Migration AssessmentOceanBase Admin ToolOceanBase Loader and DumperOceanBase DeployerKubernetes operator for OceanBaseOceanBase Diagnostic Tool OceanBase Binlog Service

Connectors and Middleware

OceanBase Database Proxy OceanBase Connector/C OceanBase Connector/J OceanBase Connector/ODBC OceanBase Connector/NETOceanBase Command-Line Client

Databases

OceanBase DatabaseOceanBase Cloud OceanBase Best Practices

Connectors and Middleware

OceanBase Database Proxy OceanBase Connector/C OceanBase Connector/J OceanBase Connector/ODBC OceanBase Connector/NETOceanBase Command-Line Client

Tools

OceanBase Cloud PlatformOceanBase Migration ServiceOceanBase Developer CenterOceanBase Migration AssessmentOceanBase Admin ToolOceanBase Loader and DumperOceanBase DeployerKubernetes operator for OceanBaseOceanBase Diagnostic Tool OceanBase Binlog Service
OceanBase DatabaseOceanBase Cloud ToolsConnectors and MiddlewareLifecycle Support Policy

OceanBase Database

  • Overview of the ecosystem
  • ORM frameworks
    • Java
      • Spring Boot
      • Spring Batch
      • Use Spring JDBC to connect to OceanBase Database
      • Spring Data JPA
      • Hibernate
      • MyBatis
      • jOOQ
    • Python
      • Use SQLAlchemy to connect to OceanBase Database
      • Connect to OceanBase Database by using peewee
      • Use Tortoise ORM to connect to OceanBase Database
    • Go
      • Connect to OceanBase Database by using GORM
      • beego ORM
    • Rust
      • SeaORM Connection to OceanBase Database
      • Diesel Connection to OceanBase Database
    • Ruby
      • Active Record
      • Sequel Connection to OceanBase Database
      • Connect to OceanBase Database by using Ruby on Rails
    • Node.js
      • Sequelize
      • TypeORM
      • Prisma
      • Drizzle
    • C#
      • Dapper
      • SqlSugar
      • FreeSQL
    • PHP
      • Connect to OceanBase Database by using the Yii 2.0 ORM
      • Connect to OceanBase Database by using Laravel Eloquent ORM
      • CakePHP
  • Database version management
    • Liquibase
    • Flyway
  • Data integration
    • Flink
      • Apache Flink
      • Flink DirectLoad
      • Flink Connector OceanBase
    • dbt
    • SeaTunnel
    • Maxwell
    • Debezium
    • Spark Catalog
    • NiFi
    • Qlik Replicate
    • RisingWave CDC
    • Flume
    • Migrate data from SQL Server to OceanBase Database by using MySQL Workbench
  • SQL development
    • WebLogic
    • DBeaver
    • Navicat
    • DataGrip
    • TablePlus
    • DMS
  • Orchestration and scheduling
    • Airflow
    • PowerJob
    • DolphinScheduler
    • Linkis
  • Visualization tools
    • Superset
    • Excel
    • Power BI
    • Quick BI
    • Tableau
    • GuanData
    • vividime
    • DataV
    • Metabase
    • Redash
    • FineReport
  • Database management
    • NineData
    • Bytebase
    • DataHub
    • Zabbix
  • AI
    • OpenAI
    • Qwen
    • LangChain
    • LlamaIndex
    • Dify
    • n8n
    • Trae
    • SpringAI
    • Cline
    • Cursor
    • Continue
    • MCP Toolbox
    • CamelAI
    • Firecrawl
    • Hugging Face
    • Ollama
    • Google Gemini
    • Cloudflare Workers AI
    • DB GPT
    • Jina AI
    • Augment Code
    • Claude Code
    • Kiro
    • GPT4All
  • Application
    • Ghost
    • Jira
    • Seata
    • SAP Crystal Reports
  • Middleware
    • Apache Pulsar

Download PDF

Document Feedback
  1. Documentation Center
  2. OceanBase Database
  3. master

Integrate OceanBase Database with Apache NiFi

Last Updated:2026-09-04 07:40:45

Prerequisites
Procedure
Step 1: Obtain the database connection information
Step 2: Configure NiFi runtime environment
Step 3: Configure dataflow pipeline
Step 4: Verify data synchronization

Apache NiFi is an automated dataflow processing platform that enables efficient and reliable data transfer between systems. By reading OceanBase Database's Binlog data, you can distribute data to various destinations including file systems, message queues (e.g., Kafka), or HTTP endpoints.

Prerequisites

  • You have deployed OceanBase Database and created a MySQL-compatible tenant.

    • You have enabled the Binlog service in the MySQL-compatibile tenant.
  • Your runtime environment supports Java Development Kit (JDK) 1.8 or a later version.

  • You have downloaded the Apache NiFi installation package.

Procedure

Step 1: Obtain the database connection information

Contact the deployment personnel or administrator of OceanBase Database to obtain the database connection string. For example:

obclient -h$host -P$port -u$user_name -p$password -D$database_name

Parameters:

  • $host: the IP address for connecting to OceanBase Database. For connection through OceanBase Database Proxy (ODP), use the IP address of an ODP. For direct connection, use the IP address of an OBServer node.

  • $port: the port for connecting to OceanBase Database. For connection through ODP, the default value is 2883, which can be customized when ODP is deployed. For direct connection, the default value is 2881, which can be customized when OceanBase Database is deployed.

  • $database_name: the name of the database to be accessed.

    Notice

    The user used to connect to the tenant must have the CREATE, INSERT, DROP, and SELECT privileges on the database.

  • $user_name: the tenant connection account. For connection through ODP, the format is username@tenant name#cluster name or cluster name:tenant name:username. For direct connection, the format is username@tenant name.

  • $password: the password of the account.

Step 2: Configure NiFi runtime environment

  1. Extract the NiFi installation package to your target directory.

  2. Modify the conf/nifi.properties configuration file as follows (using HTTP connection as example):

    # Disable HTTPS and configure HTTP access
    nifi.web.https.host=
    nifi.web.https.port=
    nifi.web.http.host=0.0.0.0
    nifi.web.http.port=<custom_port_number>
    
    # Allow insecure remote connections
    nifi.remote.input.secure=false
    
  3. Upload the MySQL driver to your NiFi server.

  4. Execute the following commands in the NiFi installation directory. Use bin/nifi.sh stop to stop the service.

    # Start service
    bin/nifi.sh start
    

Step 3: Configure dataflow pipeline

  1. Access the NiFi console at http://<nifi_server_ip>:<port>/nifi/ through your browser.

  2. Configure CaptureChangeMySQL Processor:

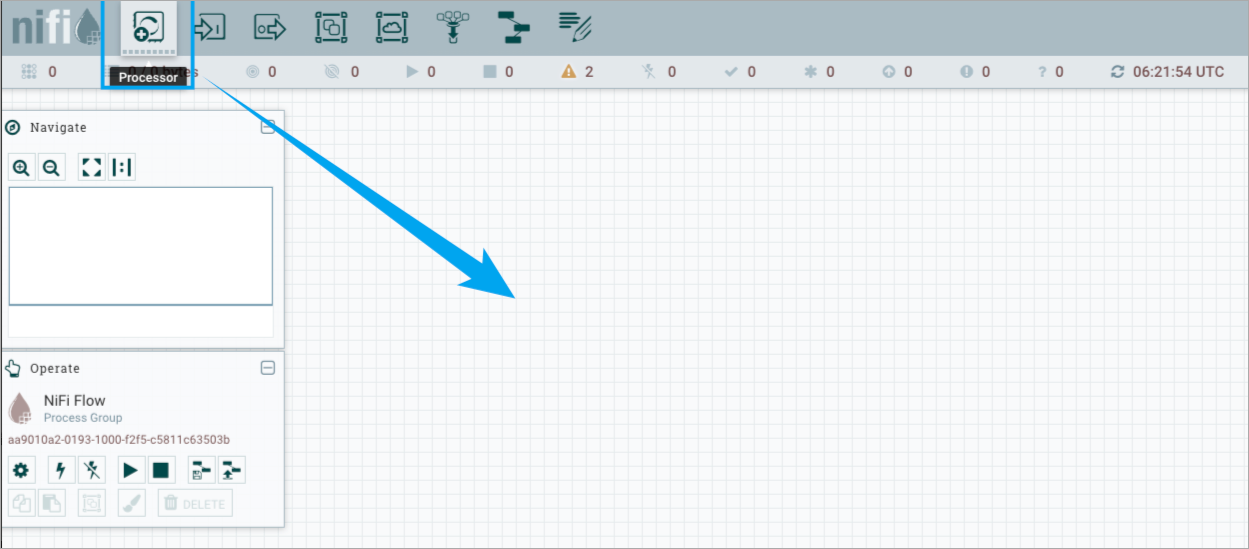
    1. Drag the Processor icon from the top toolbar to the canvas, search for and select CaptureChangeMySQL, then click ADD.
      1

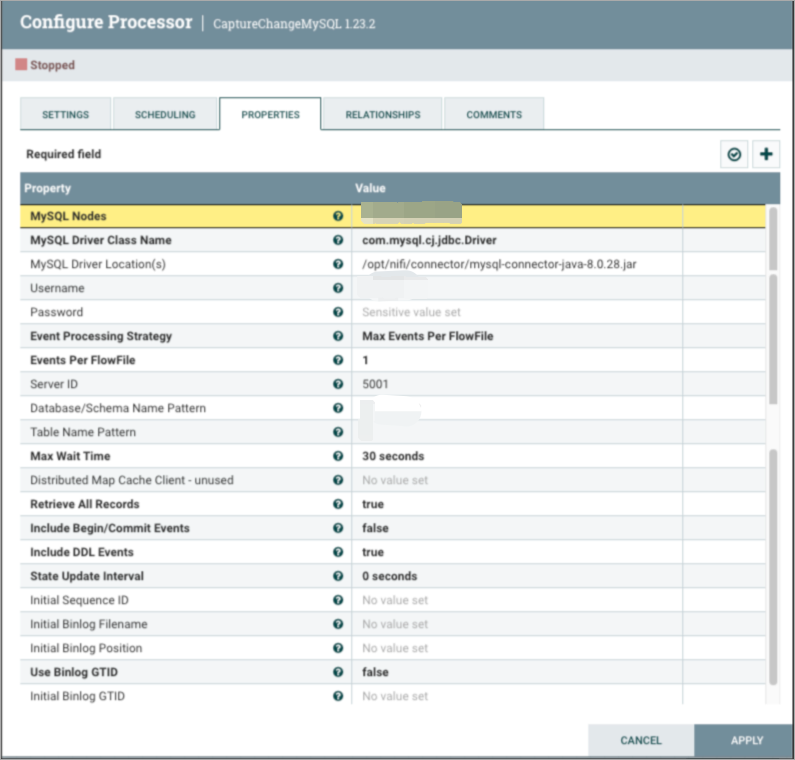
    2. Right-click the CaptureChangeMySQL Processor and select Configure. Under the PROPERTIES tab, set these parameters and click APPLY:

      Property
      Description
      MySQL Nodes OceanBase Database address and port
      MySQL Driver Class Name JDBC driver class: com.mysql.cj.jdbc.Driver
      MySQL Driver Location Directory containing the driver JAR file
      Username Database username you created
      Password Database user password
      Database/Schema Name Pattern Database to capture Binlog from (supports regex)
      Table Name Pattern Tables to capture Binlog from (supports regex)
      Include DDL Events Set to true to capture DDL changes

      2

  3. Configure PutFile Processor:

    1. Drag another processor to the canvas, search for and select PutFile, then click ADD.

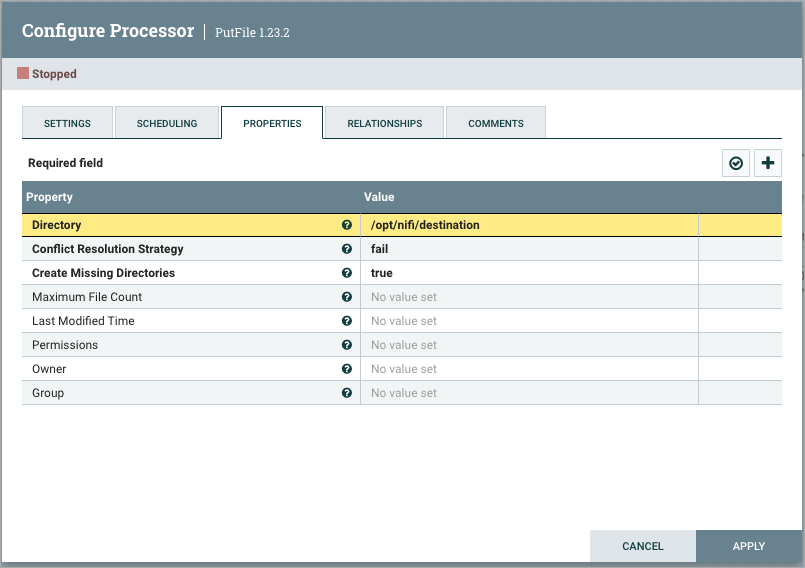
    2. Right-click the PutFile Processor and select Configure. Under PROPERTIES, set the Directory property where Binlog files will be output. Click APPLY.
      3

  4. Establish dataflow connection:

    1. On the canvas, click the arrow on CaptureChangeMySQL and connect it to PutFile.

    2. In the Create Connection dialog, click ADD.

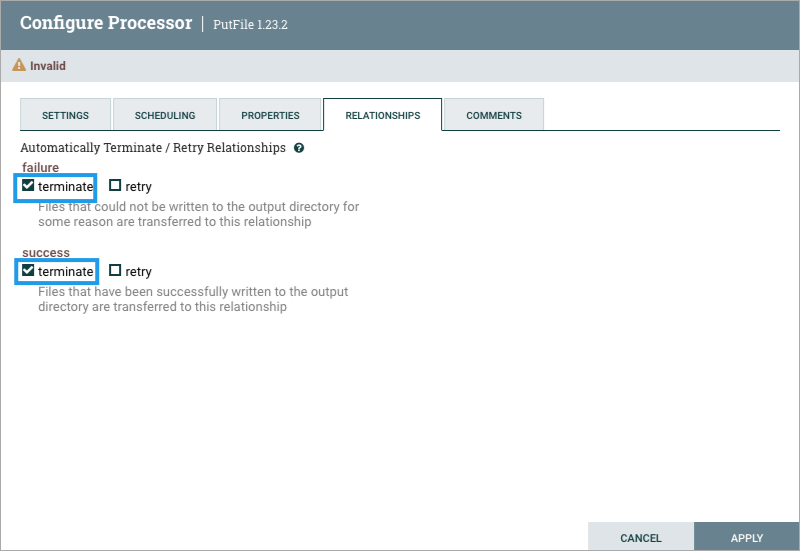
    3. Right-click the PutFile Processor and select Configure. Under RELATIONSHIPS, set both failure and success to terminate. Click APPLY.

      4

  5. Start the dataflow:

    1. Right-click the CaptureChangeMySQL Processor and select Start.

    2. Similarly, right-click the PutFile Processor and select Start.

Step 4: Verify data synchronization

  1. Insert test data into your OceanBase Database.

  2. Verify files are generated in the PutFile directory.
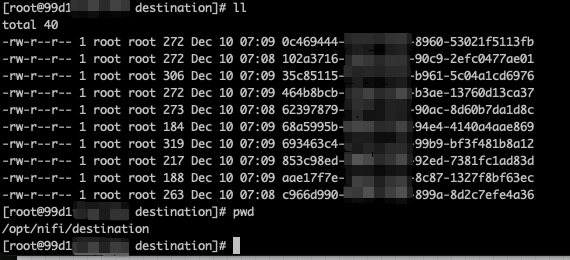
    5

  3. Inspect file contents to view the captured SQL statement information.

    6

Previous topic

Spark Catalog
Last

Next topic

Qlik Replicate
Next
on this page
Prerequisites
Procedure
Step 1: Obtain the database connection information
Step 2: Configure NiFi runtime environment
Step 3: Configure dataflow pipeline
Step 4: Verify data synchronization