
Background information
After you execute an SQL statement in the SQL window of the OceanBase Developer Center (ODC) console, you can view, edit, and export the execution result on the result tab.
This topic describes how to insert data into the employee table of the MySQL type in the result set tab.
Note
The data in this topic is for reference only. You can replace the data with the actual data in your business scenario.
Edit the result set
In the SQL window, edit and execute SQL statements to query data in the
employeetable.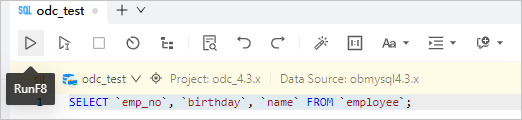
SELECT `emp_no`, `birthday`, `name` FROM `employee`;On the result tab shown in the preceding figure, click the Edit icon to edit the result set.
The navigation bar of the result tab also provides the following icons.
IconDescriptionEdit Click Edit to enable editing mode for the current result set. The editing mode supports the following operations: Add, Copy Current Row, Delete, Cancel, Confirm Modification, which submits a transaction when autocommit is enabled, and Modify and Submit, which is displayed when autocommit is disabled. In editing mode, you can either double-click the target data to directly modify it or click the preceding icons for convenient operations. When you edit a cell, you can right-click the cell and choose Copy or Set to Null from the context menu. Note
The ResultMetaData is obtained during the execution of SQL statements to indicate whether the result set can be edited.- If the result set cannot be edited, the Edit icon is hidden and a prompt is displayed indicating that the result set cannot be edited.
- If the result set can be edited, the Edit icon is available and you can click it to go to the result set editing page. You can edit result sets in single-table and single-view queries.
- However, result sets that involve the SET and ENUM fields cannot be edited.
Plan Click this icon to view the actual resource consumption and execution plan of an executed SQL statement. This allows you to evaluate the performance of the statement. End-to-end Trace View the end-to-end traces recorded during the execution of the current SQL statement. You can quickly learn the execution time of SQL statements or transaction on each node based on the end-to-end traces, to facilitate exception locating. Note
You can view end-to-end traces of only OceanBase Database V4.1.0 and later.
Back to Start Click this icon to go back to the first page. Previous Click this icon to go to the previous page. Next Click this icon to go to the next page. Jump to Bottom Click this icon to go to the last page. Search Enter a keyword in the search box to search for the desired results. Download Data Click this icon to export query results. Columns Click this icon to select the columns to be displayed on the page. Column Mode Click this icon to display the selected data row in the form of a table. On the Column Mode tab, you can switch to the previous or next row. The column mode makes it easier to view data in a row that has many columns. Procedure:
1. Select the data that you want to view and click Column Mode .
.
2. On the Column Mode tab, click the left or right arrow to switch between the column values of adjacent rows.
3. Hover the pointer over a value field and click the zoom-in icon to view the details.
4. In the table on the Column Mode tab, you can view the comments for a column in the Remarks column. Perform the following steps to modify the comments:
a. In the left-side navigation pane, right-click the target table and select View Table Structure to go to the Attribute tab.
b. In the left-side navigation pane of the Attribute tab, click the Column tab.
c. Select a field and click the Edit icon. The field editing dialog box appears.
d. In the Comment field, edit the comments, and click OK.
e. In the SQL Confirmation dialog box, click Execute.
f. View the modified comments on the Column Mode tab.Notice
You cannot edit a result set that contains the SET or ENUM field type.
Click the plus sign (+) to add a row and edit data.

Click Modify and Submit.
Note
If the current connection uses the shared session mode, the submitted modifications take effect on all windows.
In the SQL Confirmation dialog box, click Execute.
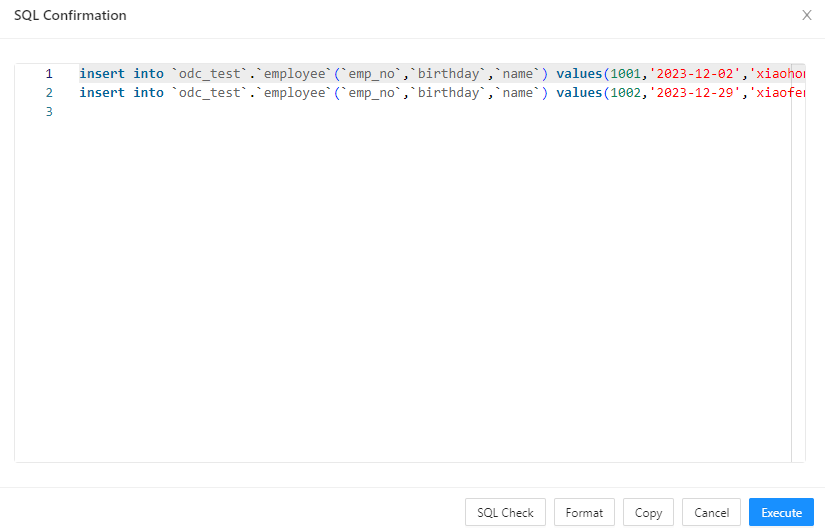
The edited data is added to the result tab.

You can perform the following operations on a result set to facilitate routine development.
OperationDescriptionSelect required data You can select the required data of a result set and copy the data to an external file by using hotkeys. You can also click a field name or row ID to select an entire row or column. You can also click Export in the toolbar to export data of a result set to a local file. Select rows and columns - You can select consecutive rows or columns while holding the Shift key.
- You can select inconsecutive rows or columns while holding the Ctrl or Command key.
Right-click a cell You can right-click a cell and select Copy or Export to Clipboard to directly export the data into an external file. Right-click a row ID You can right-click a row ID and select Copy Row, Freeze this row, Unlock all frozen rows, or Export to Clipboard. - Copy Row: Select this option to copy the selected row.
- Freeze this row: Select this option to freeze the selected row and pin it to the top. You can freeze multiple rows. The rows under the table header and frozen rows can be vertically scrolled.
- Unlock all frozen rows: Select this option to unfreeze all frozen rows.
- Export to Clipboard: Select this option to output the entire row to the clipboard in the SQL or CSV format.
Zoom in If the data in a cell is excessively long and cannot be fully displayed, you can move the pointer over the cell and click the zoom-in icon  at the right end of the cell. In the window that appears, view the data in full.
Note
LOBs are displayed in text by default. You can convert a LOB into the hexadecimal format and download the LOB to a local device.
View BLOBs On the result tab: - In Oracle compatible mode, you can directly edit text data of the CLOB, BLOB, or RAW type, edit hexadecimal data, and upload files. An uploaded file cannot exceed 2 MB in the text format, 200 KB in the hexadecimal format, and 20 MB in the picture format.
- In MySQL compatible mode, you can directly edit text data of an XLOB type such as BLOB, MEDIUMBLOB, or TINYBLOB, edit hexadecimal data, and upload files.
Right-click the tab name of a result tab For example, you can right-click the tab name of the Result 1 tab and click Pin in the context menu to pin the tab, so that it remains displayed. In this way, when you execute a new query, a new result tab appears but does not overwrite the pinned result tab. This allows you to compare the query results. Click Unpin to unpin a result tab. Filter, sort, and search for data Each field name in the result set is provided with a filter icon, a sort icon, and a search icon. You can use them to filter, sort, and search for data in a single column. Drag the column name You can adjust the order of fields by dragging column names in a result set. Adjust the column width You can adjust the column width by dragging the column edge. Display the field type and remarks in the status bar You can click a field in the result set to display the type and remarks of this field in the status bar at the bottom of the page.
Export the result set
Example: Export the employee table as an EXCEL file to your local disk.
In the result set, click
 .
.
In the New Export Result Set panel, specify the information of the export task and click New.
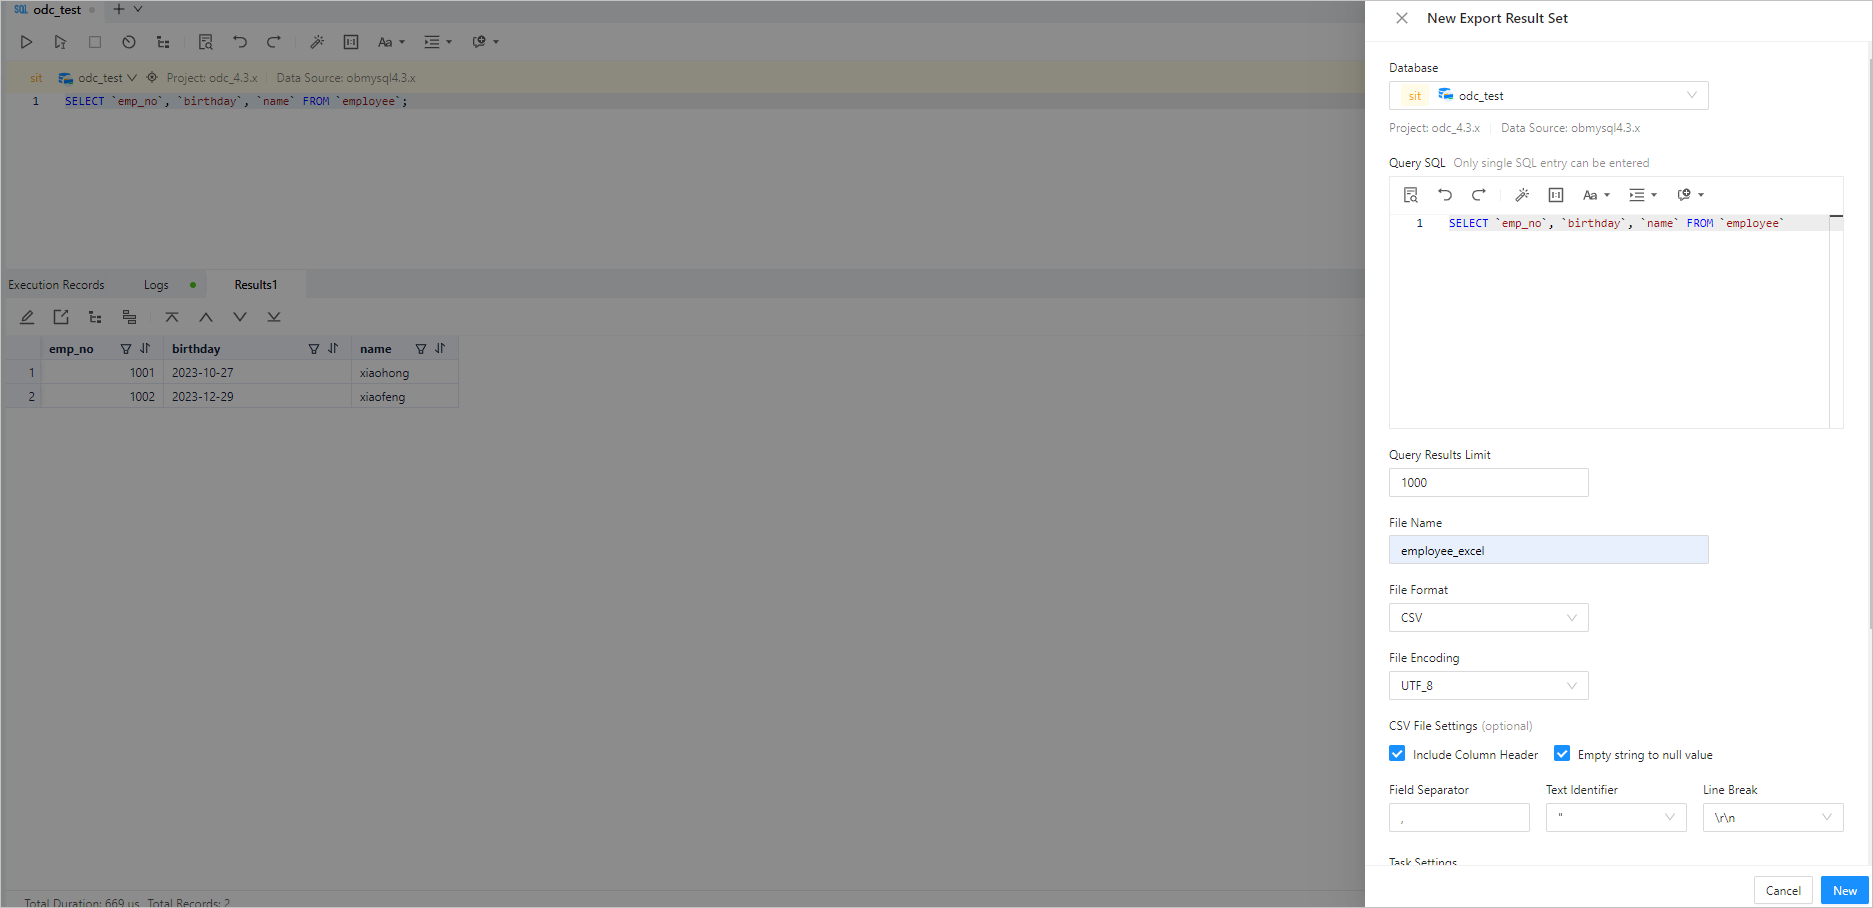 ParameterDescription
Query SQL Write a query SQL statement to select the data to export. Maximum Number of Rows in Result Set The number of rows to export is no longer limited by the query window. You can define the number of rows to export. File Name Enter the name of the exported file. File Format You can export the query result as a CSV, SQL, or EXCEL file. - To export an SQL file, specify Query SQL, Maximum Number of Rows in Result Set, File Name, File Format (to SQL), File Encoding, Data Desensitization, and SQL File Settings (such as Table Name).
- To export a CSV file, specify Query SQL, Maximum Number of Rows in Result Set, File Name, File Format, File Encoding, Data Desensitization, and CSV Settings (such as Include Column Header, Empty string to null value, Field Separator, Text Identifier, and Line Break). You can use EXCEL to open the exported CSV file.
- To export an EXCEL file, specify Query SQL, Maximum Number of Rows in Result Set, File Name, File Format, File Encoding, Data Desensitization, and Excel File Settings (such as Include Column Header and Export SQL to another Sheet). When you export an EXCEL file, you can define whether to include column headers and whether to export query SQL statements.
File Encoding Specify the file encoding format. Excel File Settings Specify whether to export column headers and whether to export SQL statements to another sheet. On the Tickets > Export Result Set tab, click View in the Actions column of the task.

In the Task Details panel, click Download.
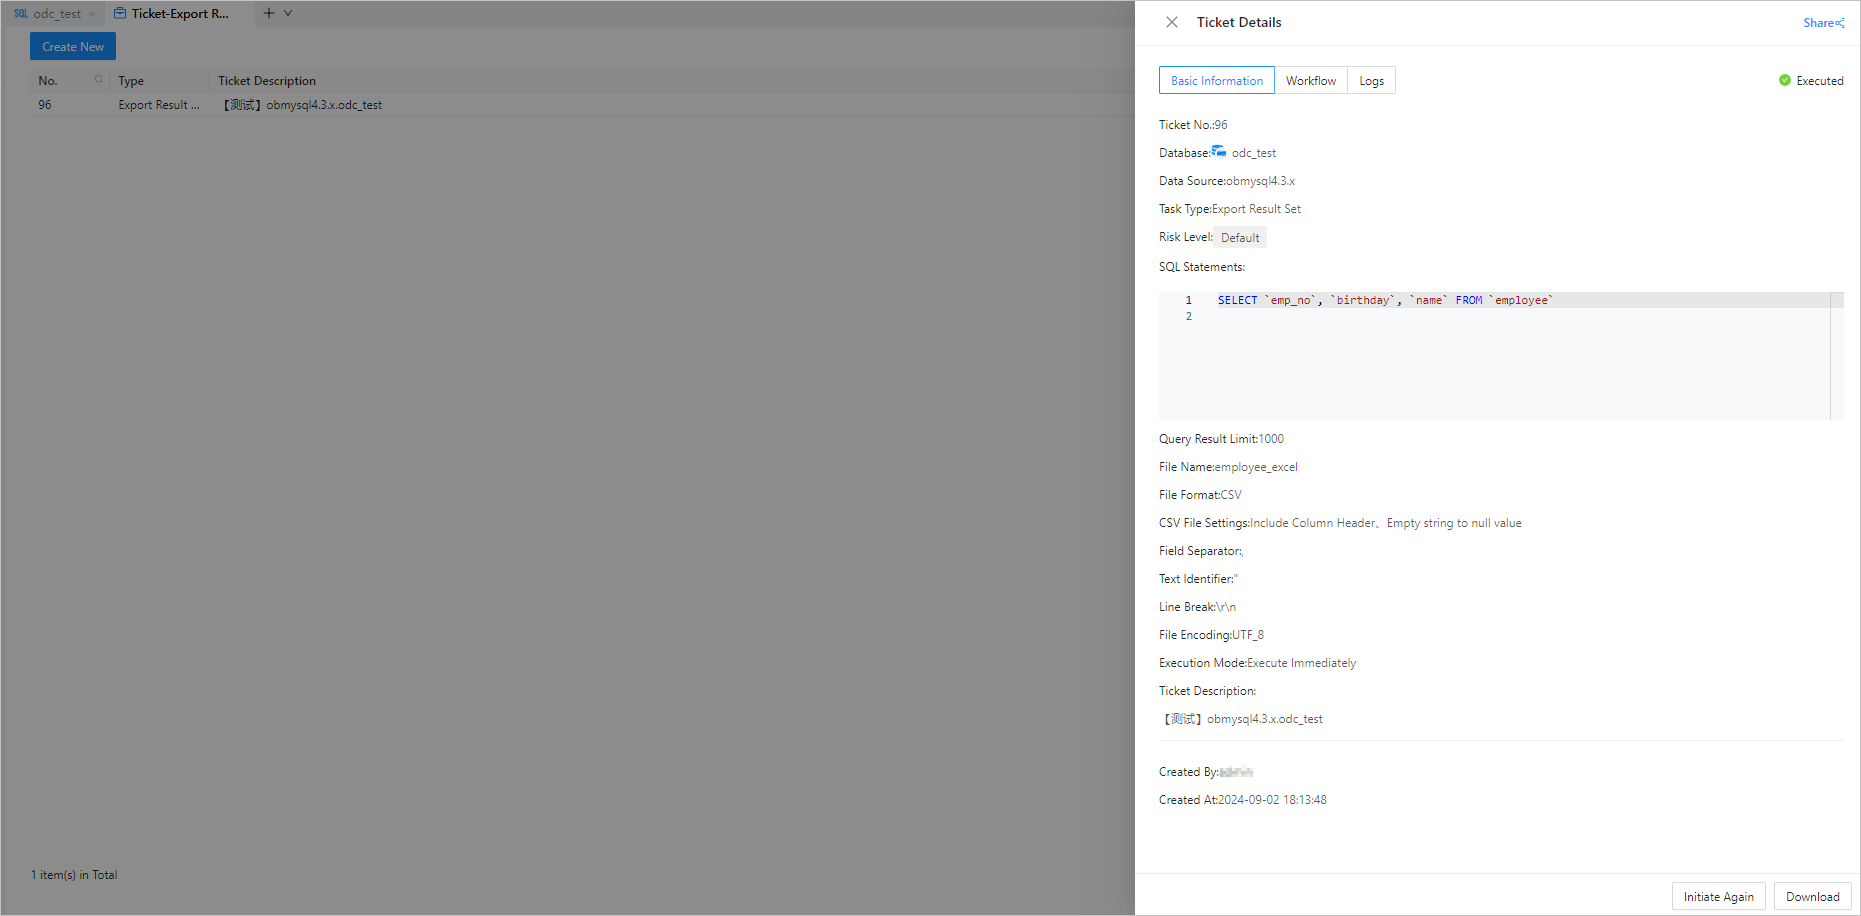
View the exported
employee_excelfile in your local disk.
View the exported result set
Go to Tickets > Export Result Set, and click the name of the target task in the task list to view the task details. You can also click the ··· in the Actions column to perform more operations on the task.
- Execute: When the execution mode is manual, click this option to execute the task.
- Terminate: When the execution mode is periodic or scheduled, click this option to terminate the task. You can also select the target tasks and click Batch Terminate at the top to terminate multiple tasks.
- Edit: When the task status is disabled, click this option to edit the task.
- Delete: When the task status is completed or terminated, click this option to delete the task.
- View: View the task details.
- Clone: Copy the task execution content to quickly generate a new task with the same configuration.
- Share: Quickly copy the task access address.
- Download: Download the generated mock data to the local disk. You can view the exported data structure file from the local disk.
In the task details panel that appears, the Basic Information tab is displayed by default. You can view the task type, database, variable configuration, and execution mode.
Note
You can configure whether to allow queries and downloads of query results in the system settings. For more information, see System settings.
Click the Workflow tab to view the task status, approval status, execution status, and execution result.
Click the Logs tab to view all logs and alert logs of the task.
ItemDescriptionAll Logs All logs display the INFO, ERROR, and WARN logs of the task. You can click the Find, Download, and Copy buttons to find, download, or copy all logs. Alert Logs Alert logs display the ERROR and WARN logs of the task. When the task fails, you can view the error information in the alert logs. You can click the Find, Download, and Copy buttons to find, download, or copy alert logs.